New Build Kitchen Reveal
Ey friends! Been staying busy over here with making our new build house a home. Our first major project we tackled was our kitchen!

The “before” of our kitchen.
Our kitchen sits on the main level on our second floor. It’s an open floor plan with our living room (which, at this point, is partially done… we’re planning something really cool in there!). The "before" was a blank slate of purposefully unpainted cabinets. Chad and I are both pretty handy and love doing things ourselves. When we went to the Design Center in the process of building our home, we pretty much did zero upgrades. For one thing, most of the upgrades would have been way more expensive (read: overpriced) than us just upgrading stuff ourselves. For another thing, the interior design ideas we had in our heads just couldn’t be found in a Design Center.

Chad and I figuring out how to remove the original trim on the cabinets, in case we wanted to reuse them for anything (we did not).
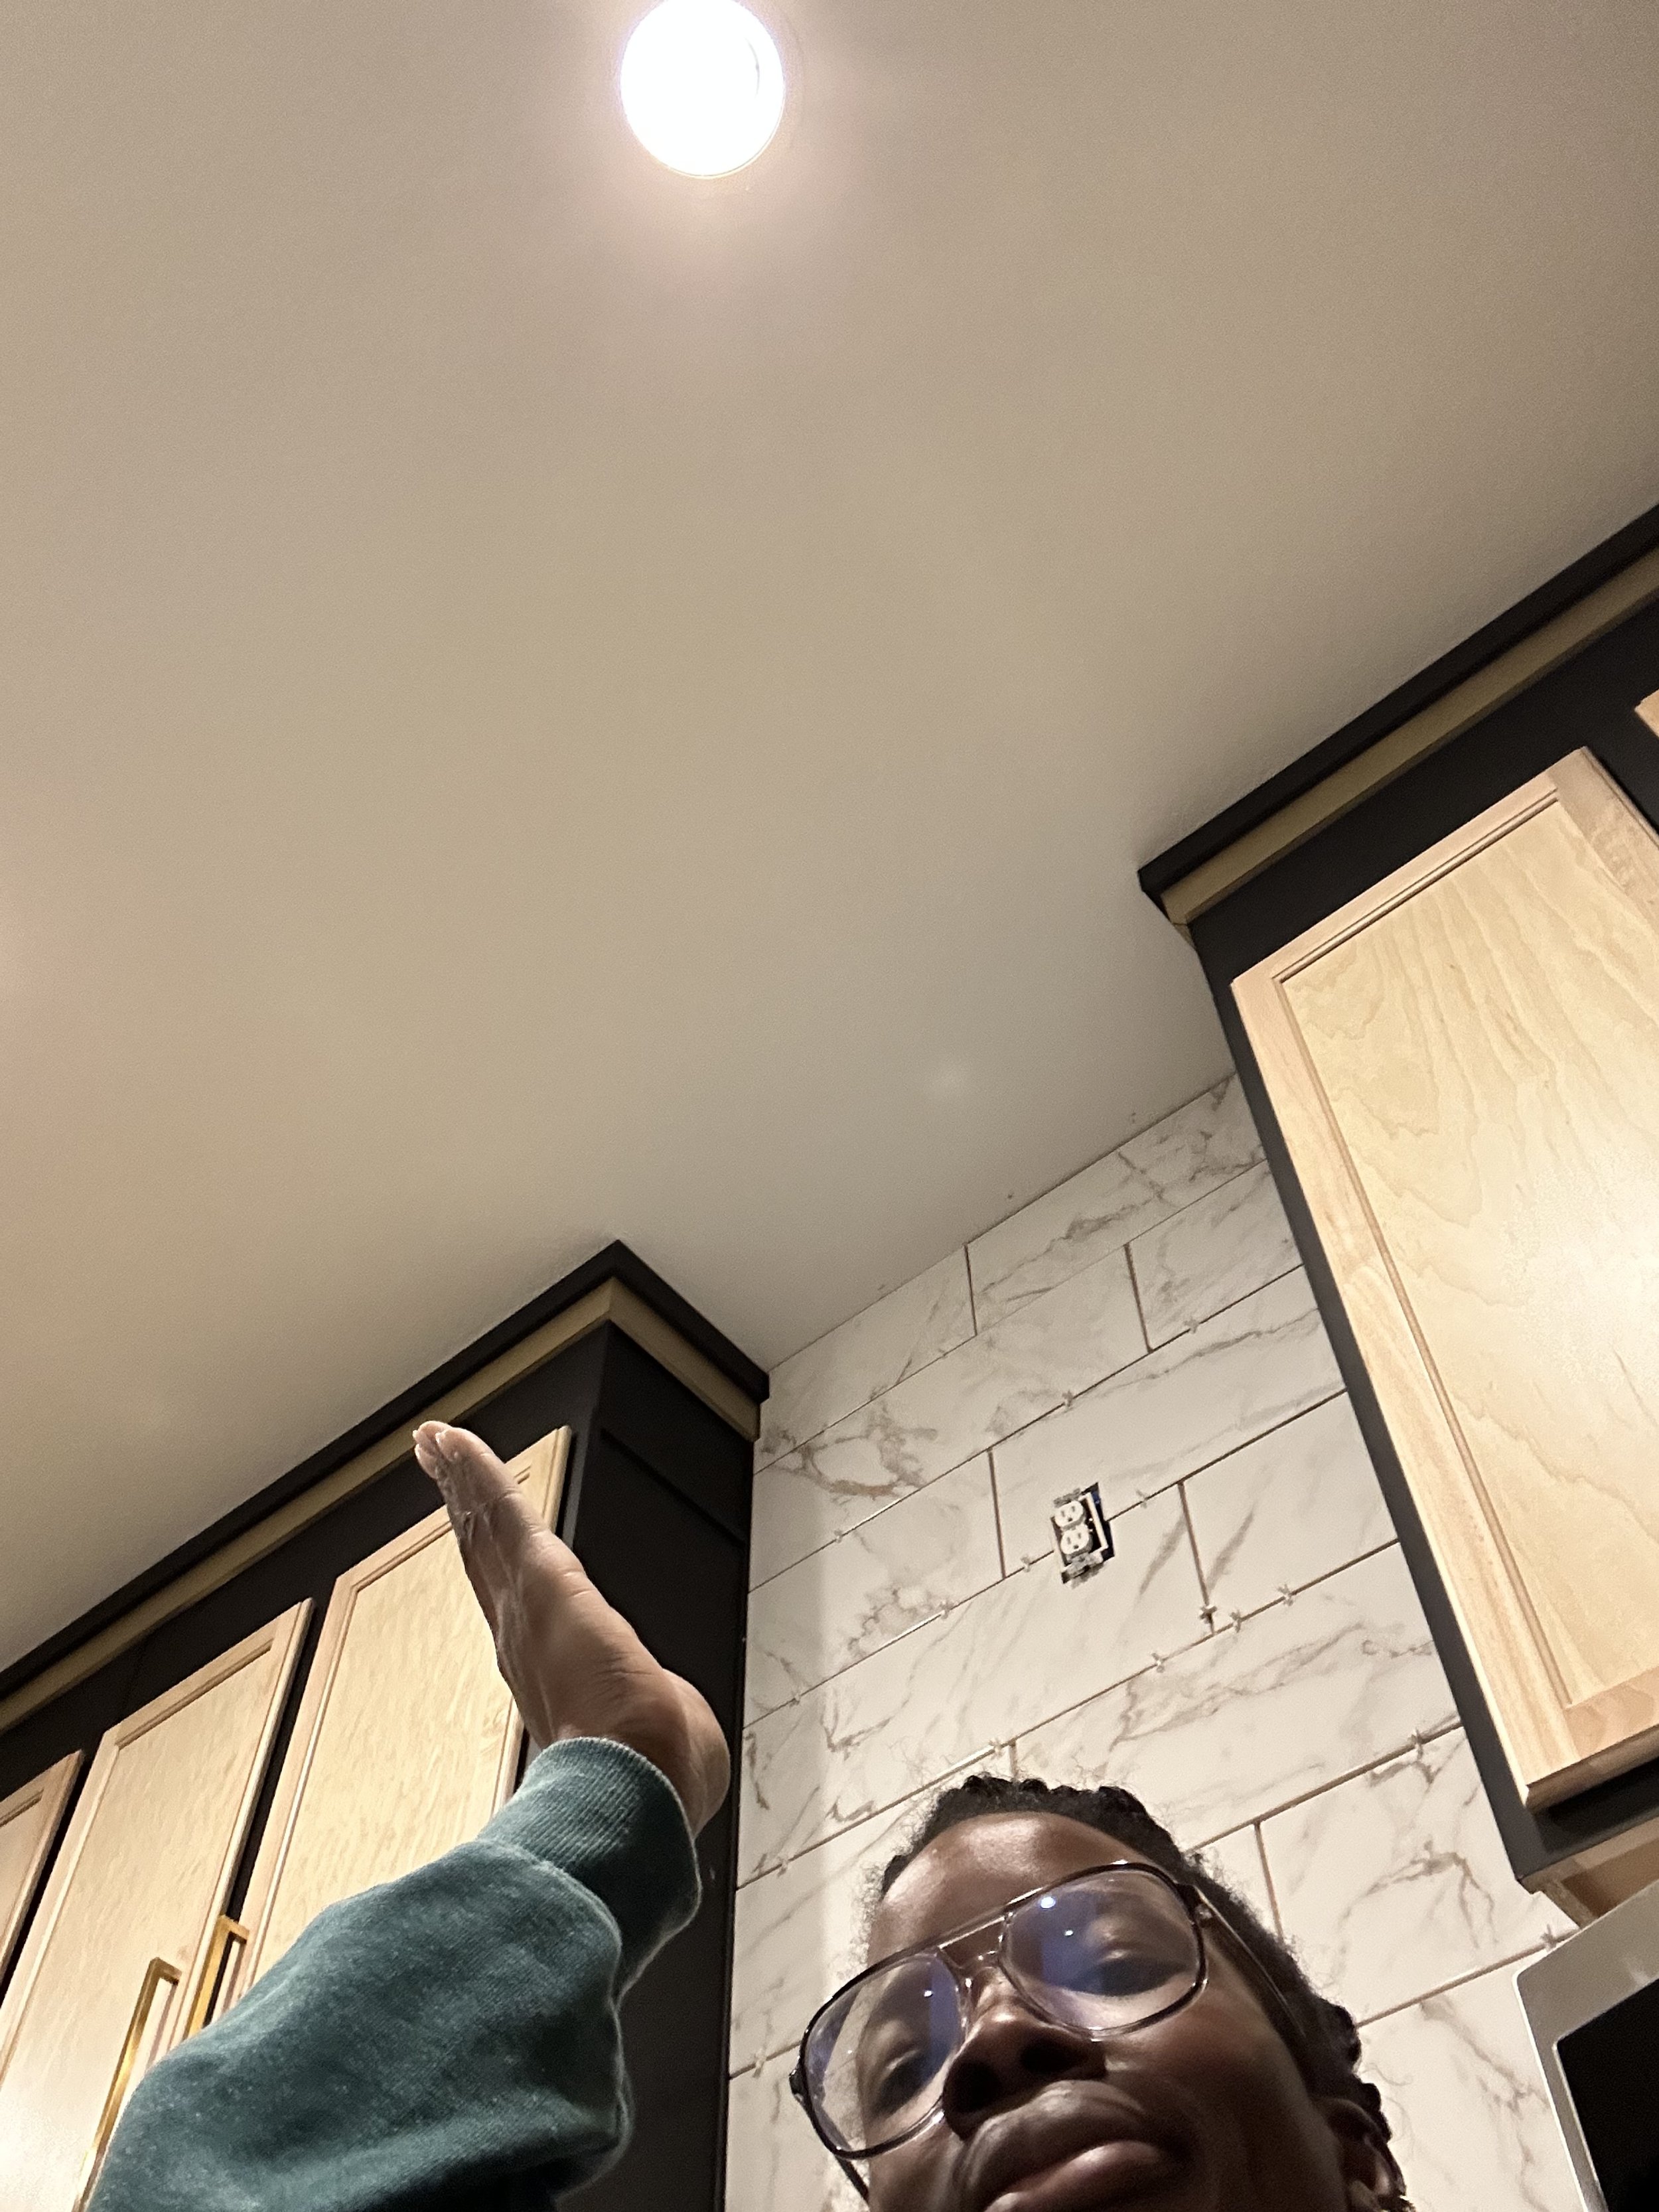
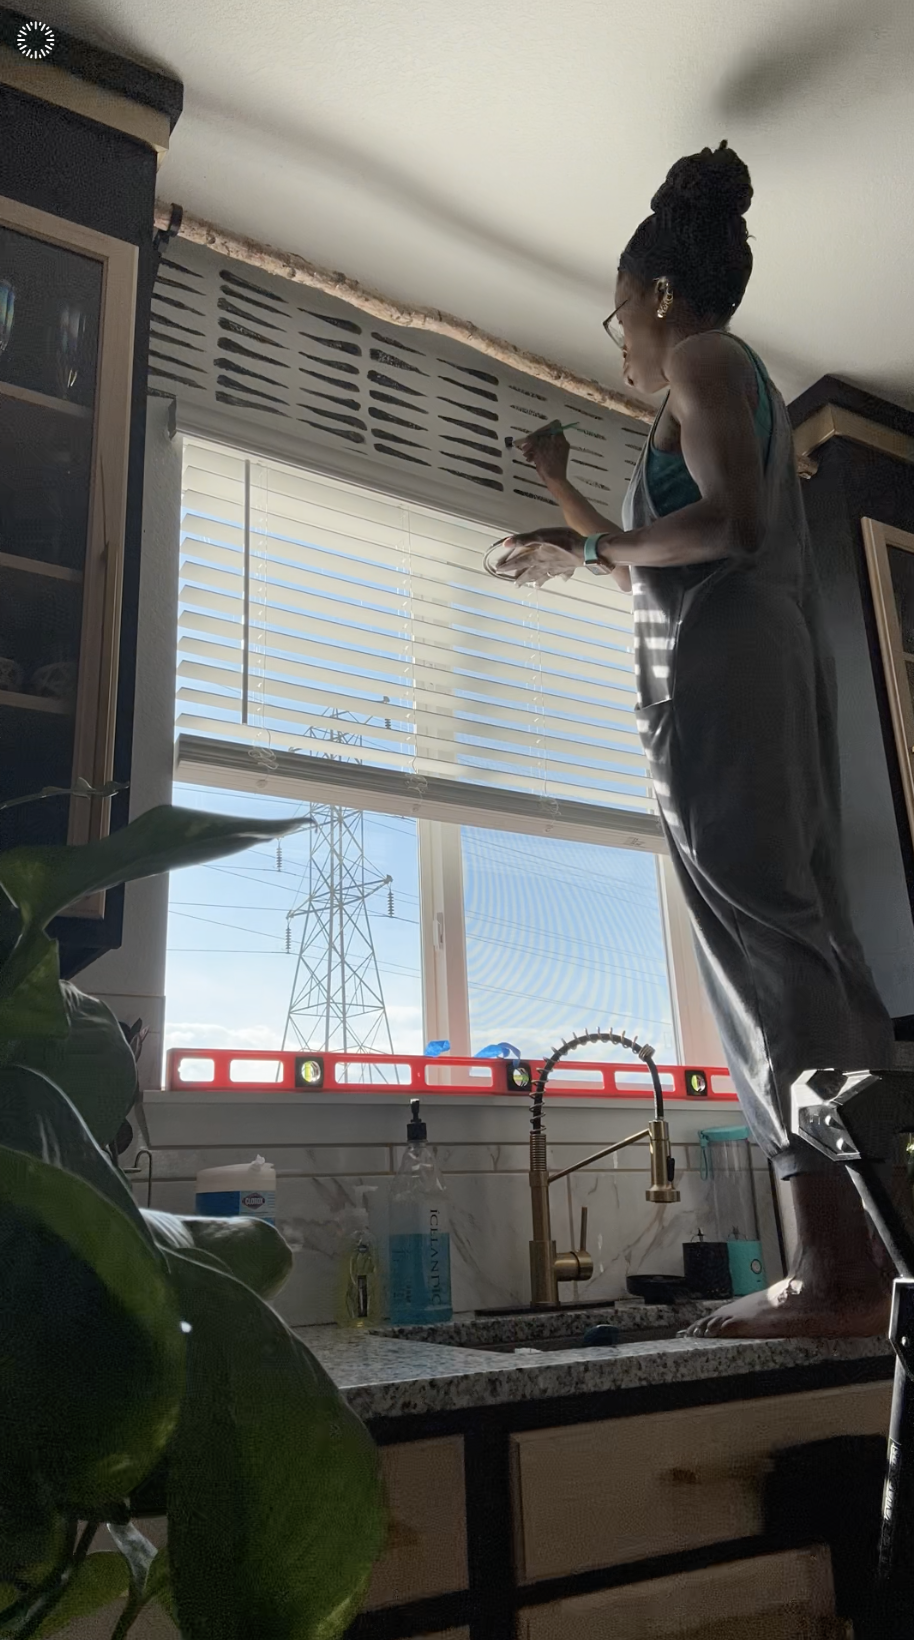
While the open floor plan of this space, and just wanted to define the different areas a bit. This was easy to do with some paint on the cabinets and the hand-painted wallpaper I did myself in the kitchen! More on that later in this post. One of the first things I told Chad I wanted to do in our kitchen was TAKE THE CABINETS UP TO THE CEILING. You all, I have never understood the space above kitchen cabinets. Am I alone in this? Really, why is it there? For what purpose and for what cause? To me, all that space is good for is collecting cobwebs, and ain’t nobody got time fuh dat. The amount of dead flies already up there in our brand new home was enough proof for me. More power to ya if you can make it look good, but I don’t like the look of having items above the cabinets in order to try to make use of that space. I’d rather just have it look clean and close it off. I have always anticipated that once I got my dream home, part of my dream kitchen would be cabinets that go up to the ceiling.
At first, Chad didn’t see the vision. I was hard-pressed to find examples of what I was talking about on Pinterest, but eventually I found at least some decent images, though none of them looked like how ours would. We’d already decided we were only going to paint the housing sections of the cabinets and not the doors or drawer fronts. This is the whole reason why we chose to leave our kitchen cabinets as just bare wood in the Design Center, much to our Design Center person’s utter confusion. I definitely wasn’t finding any examples of that design style anywhere on Pinterest, but I knew what I wanted with the cabinets-to-the-ceiling look, and we knew we wanted a two-tone kitchen. I’ll make a future post on a more in-depth look at how we did those! Stay tuned.
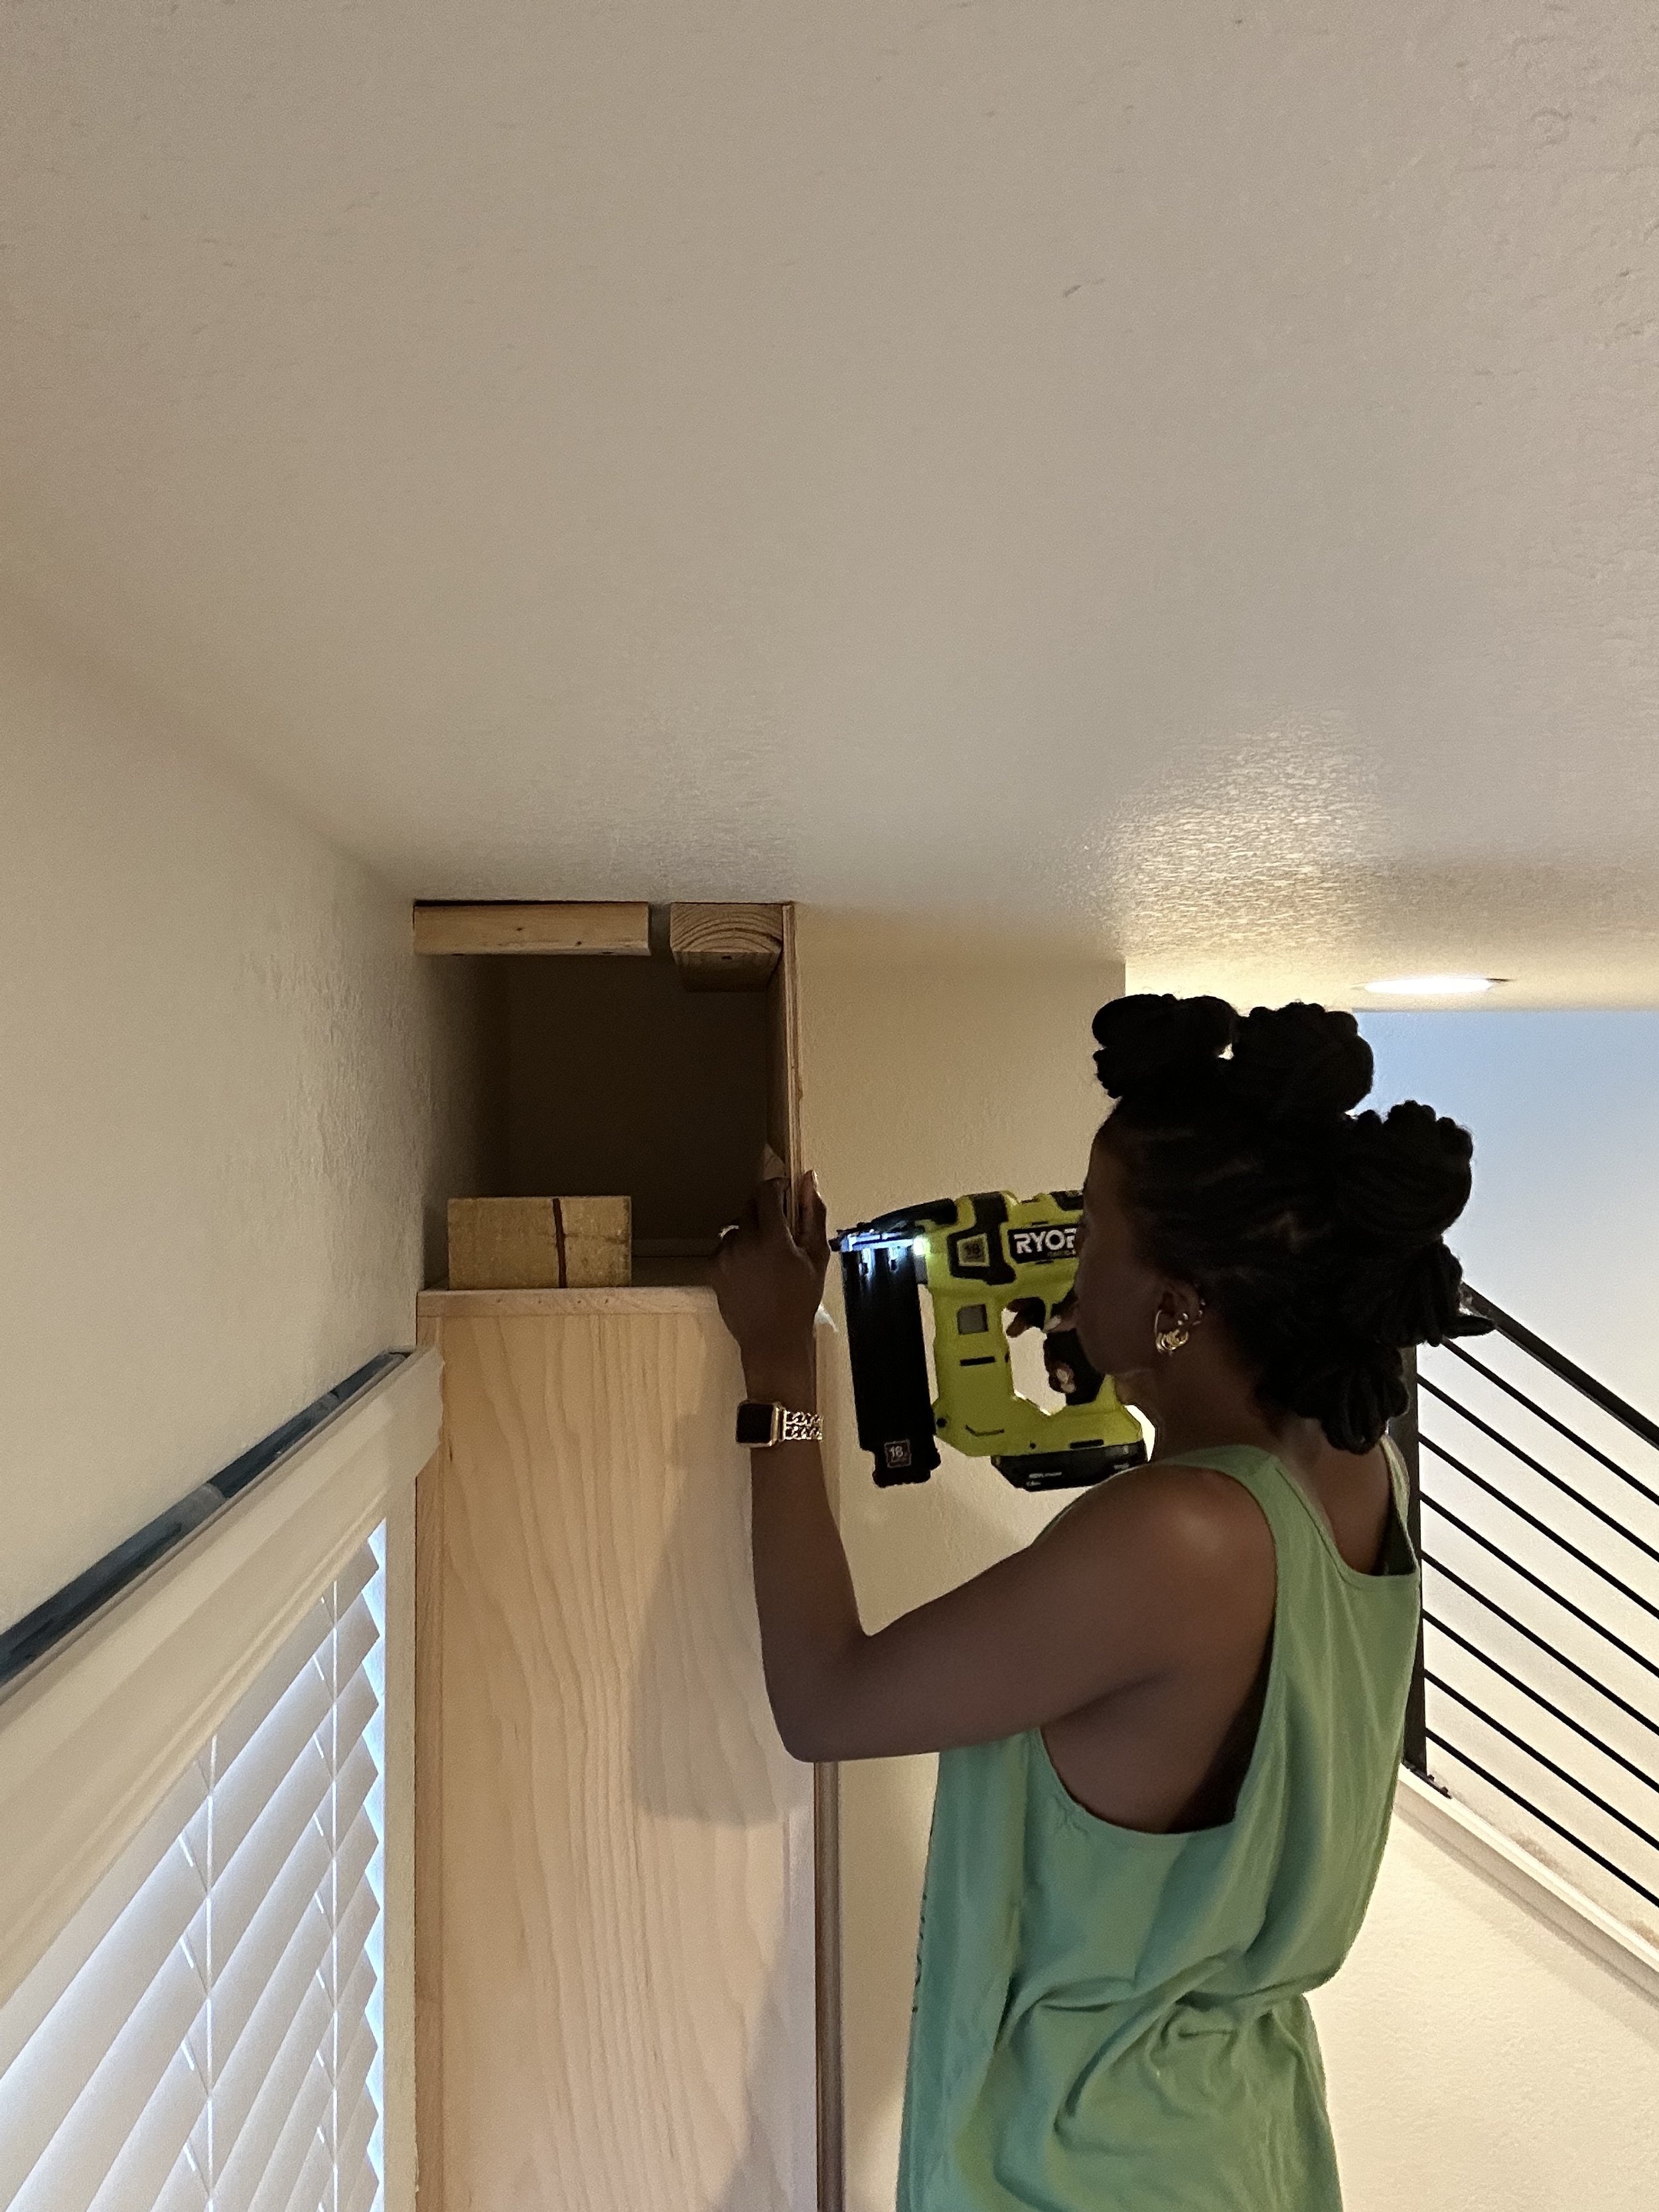

L: Nail-gunning our cabinet attachments we finagled. R: Almost finished updated cabinets, before we added the vertical trim pieces and the cabinet pulls.
Once we added the to-the-ceiling extensions to the tops of our cabinets, we painted those and the housing section of the cabinets black using Onyx Black paint by Behr. I love this black because it’s just deep enough to hide imperfections, yet not so dark that items painted in it become an abyss. Chad had the brilliant idea to add a peeking gold trim at the tops of the cabinet extensions, and it’s one of my favorite little details! We added a final black trim over top of that. Eventually we also added a thin vertical trim between the original cabinets and the gold trim, because we wanted that space to be in line with the rest and not indented. You can see in the picture here what it looks like before we added those vertical trim pieces.
Only a detail we would notice? Probably, but still worth it.

Our new gold pendant lights above our island that Chad wasted zero time installing. I luh him.
Because of the new dramatic height of our top cabinets, we wanted whatever cabinet and drawer pulls we used to match that. I found some extra long gold pulls that were a compromise of what Chad and I wanted (I wanted thick and taller, he wanted thin and shorter). When the pulls arrived, we were relieved to find that they matched perfectly with both our new gold pendant lights above our island and our striking new gold and black faucet. Chad had installed both the pendant lights and the faucet the day we moved in, and they instantly uplifted the feel of our kitchen.
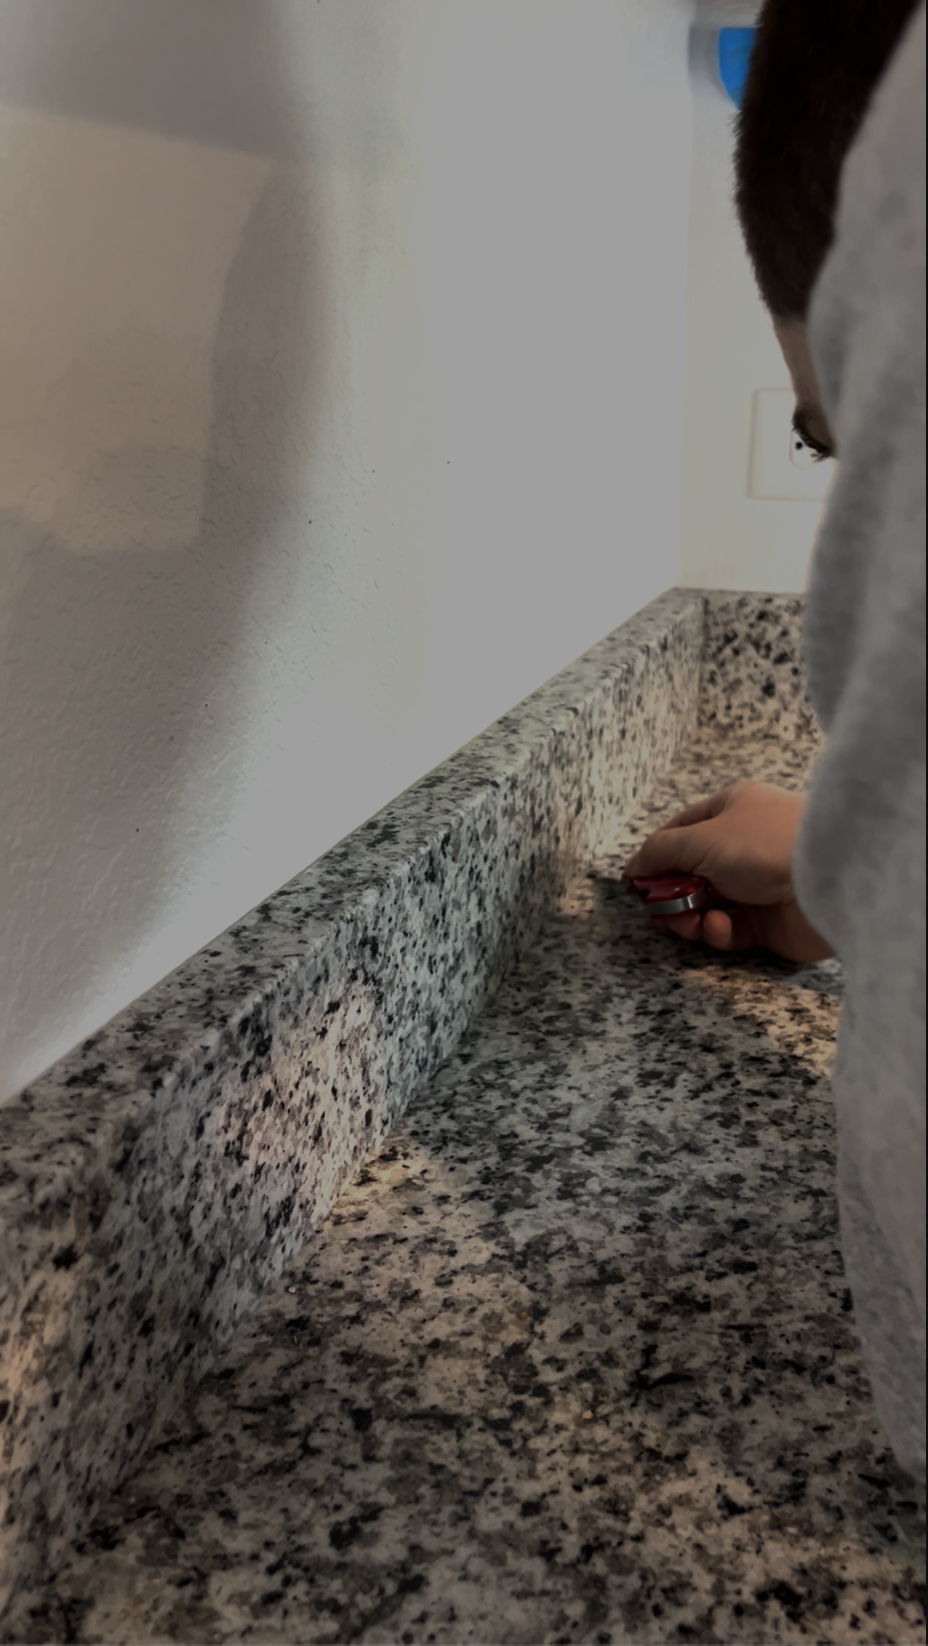
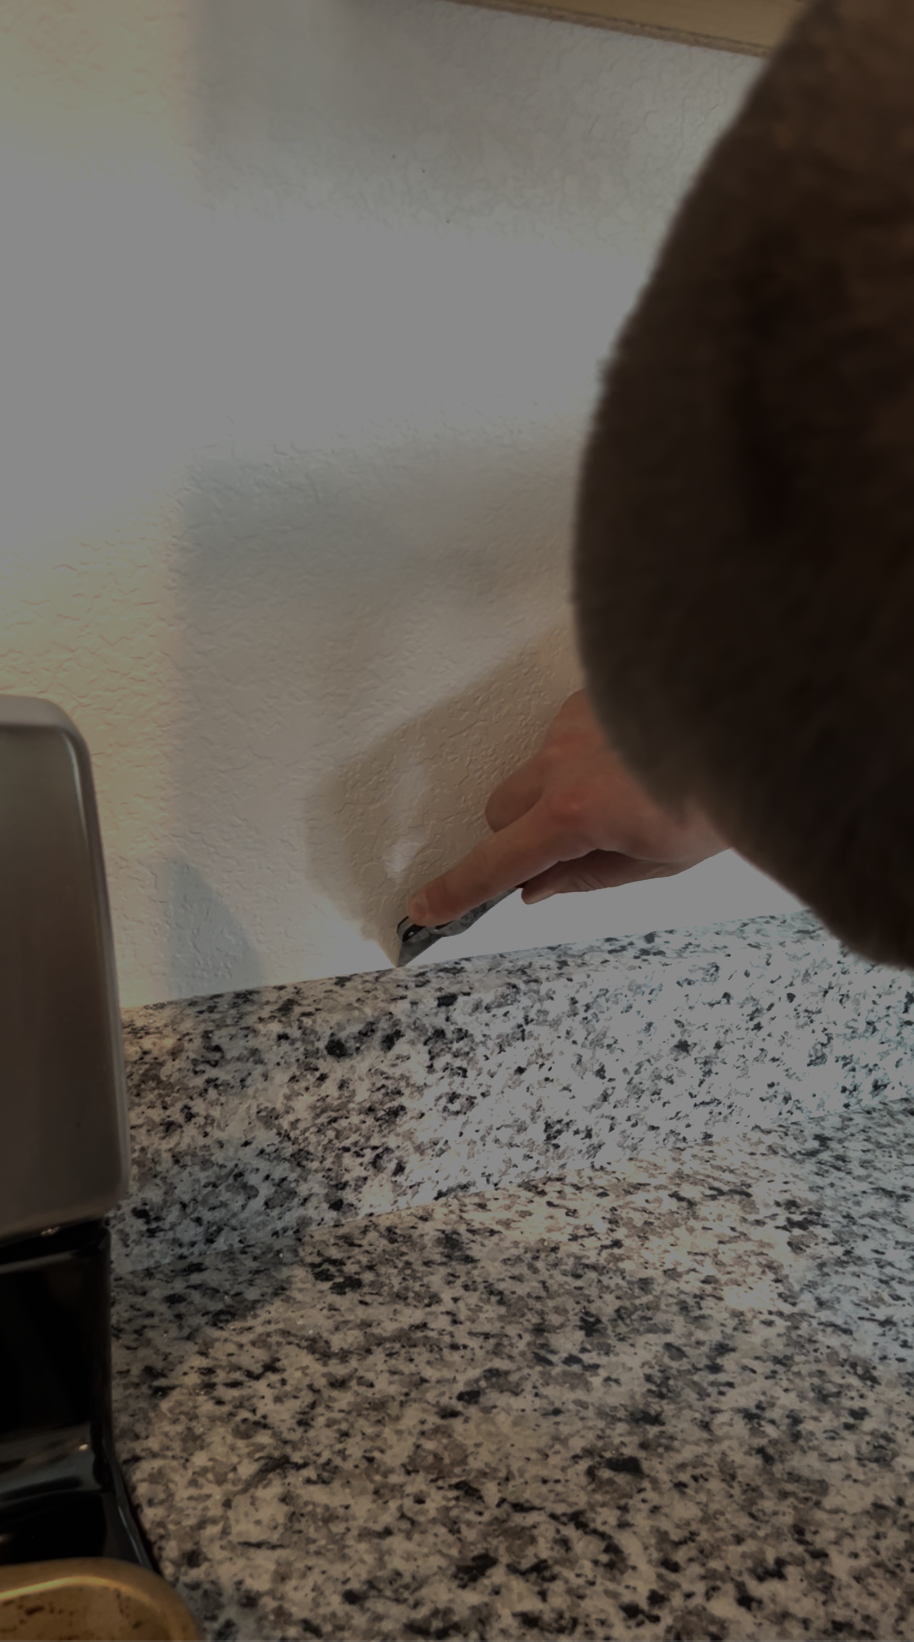
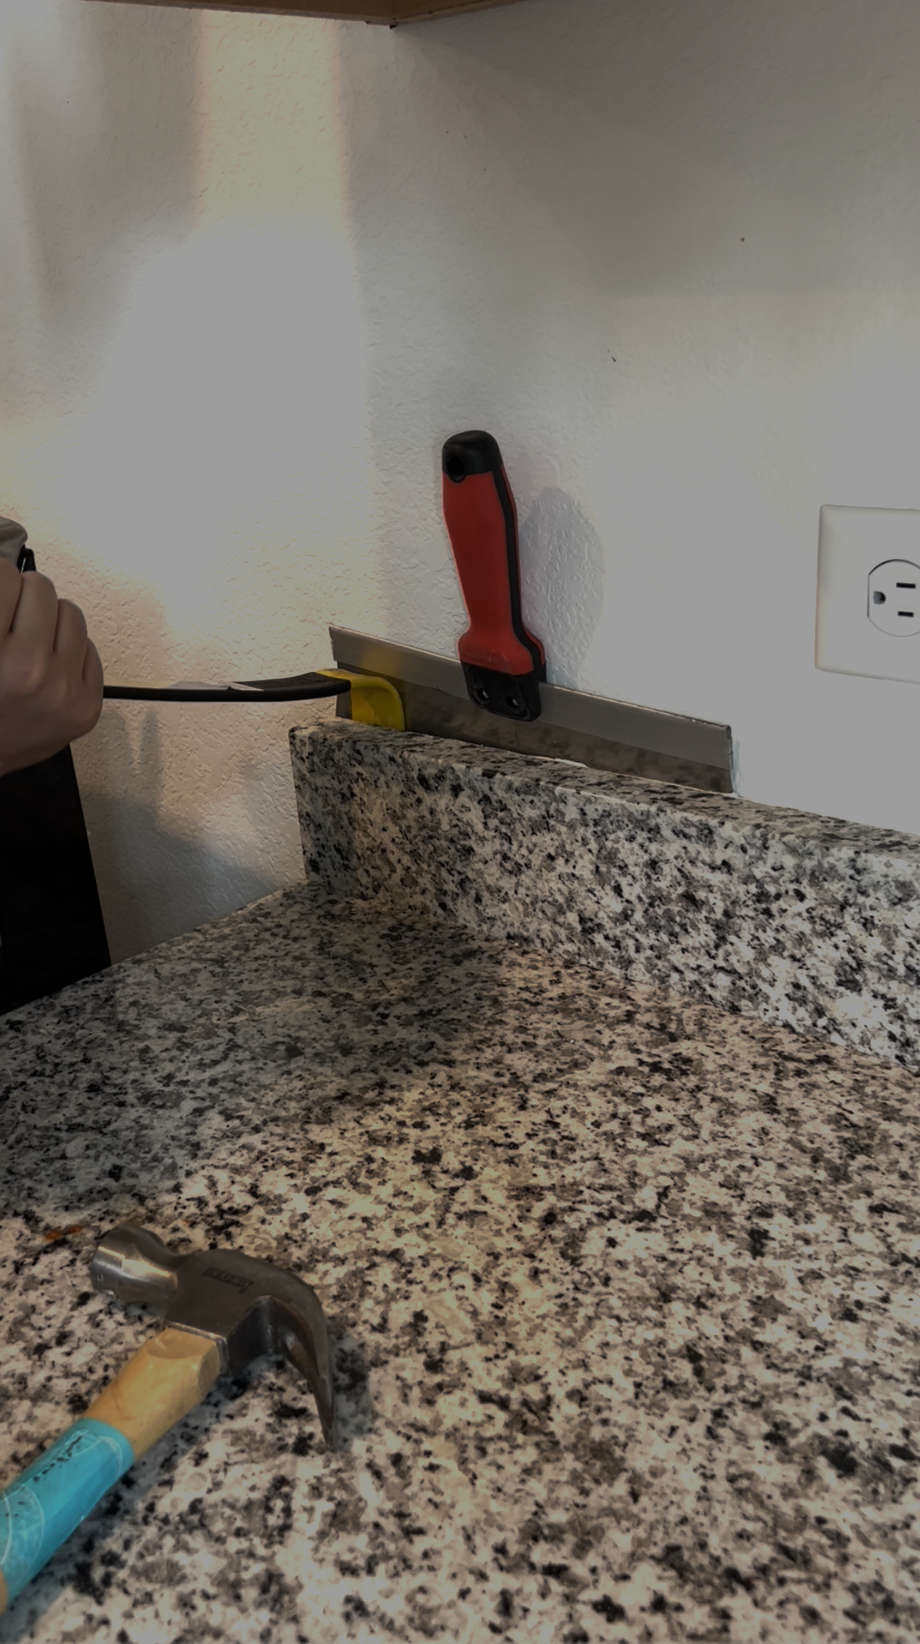
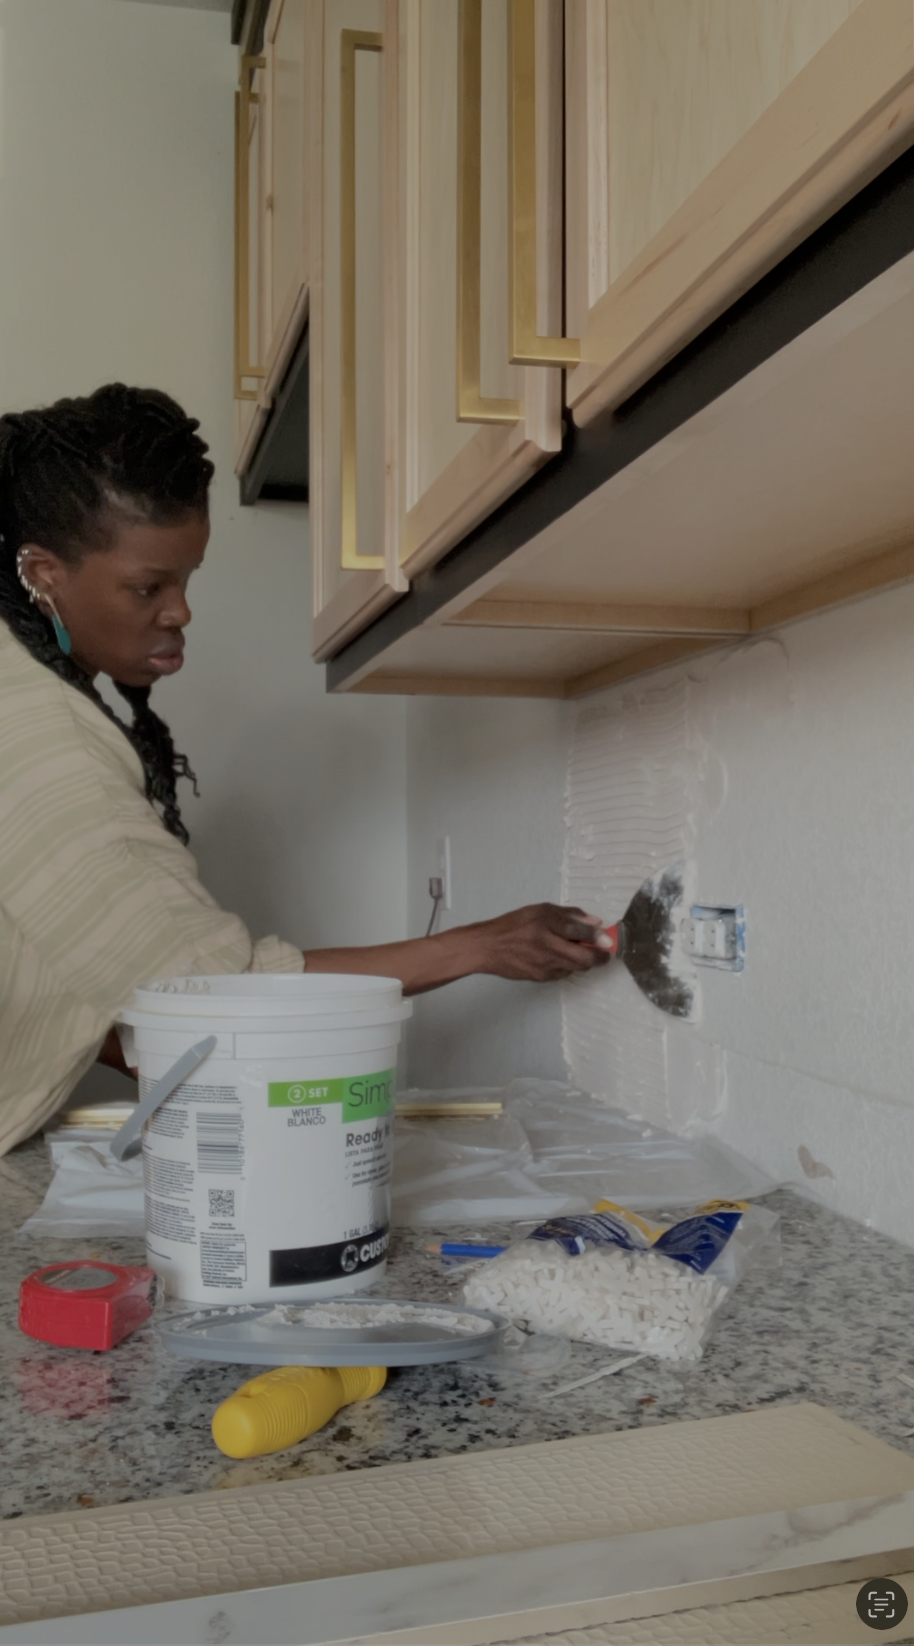
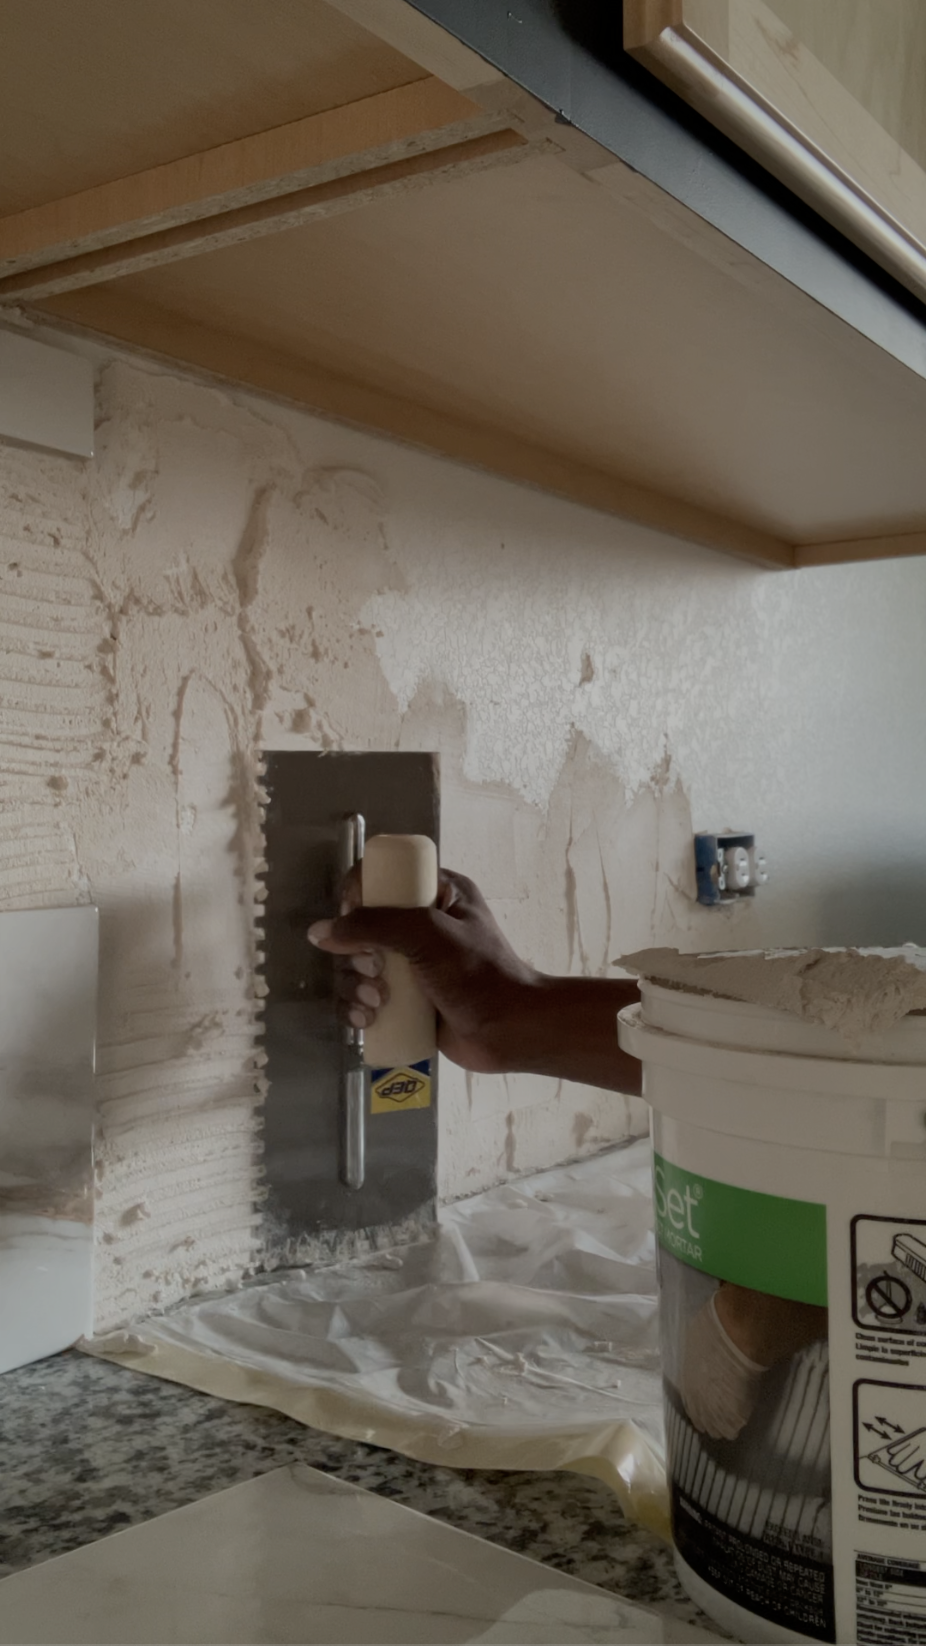
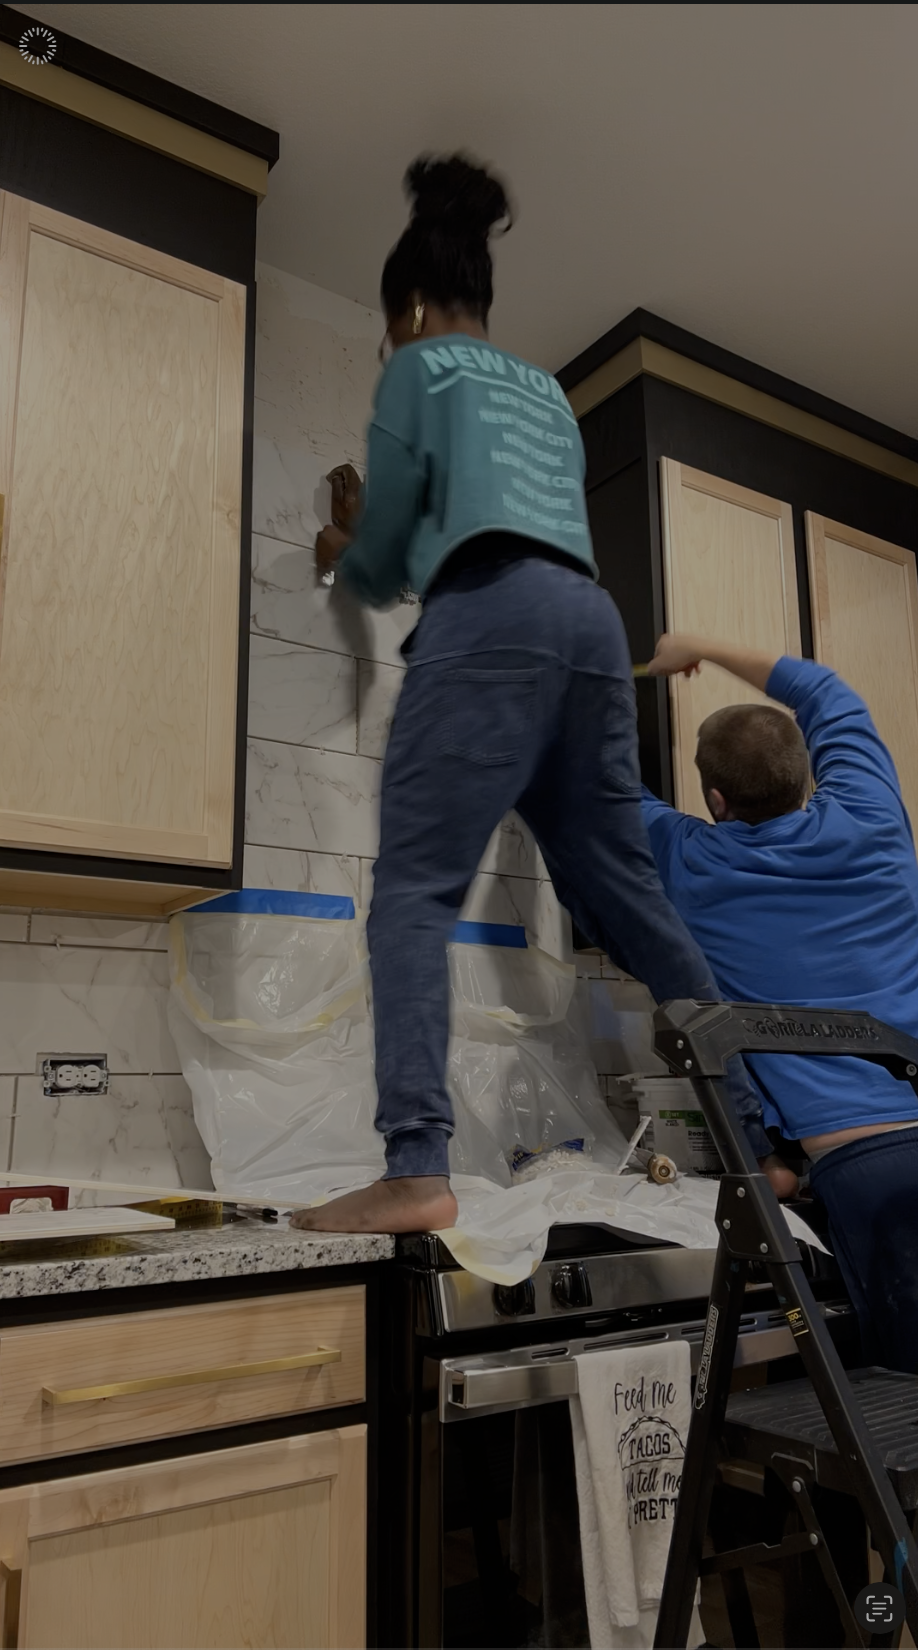
We knew we wanted to install our own backsplash, even though I’d never done backsplash or anything close to working with tile before. We opted for this gorgeous extra large marble tile so it would cover more space at once and be easier to work with than smaller pieces. Plus, the large size would be in line with the tall feel of the kitchen. We also removed the 4-inch granite backsplash that the builder installed so that we could have a cleaner look with our DIY’ed backsplash going all the way down to the countertops. We did this by using a utility knife to score where the caulk was on both the top and bottom, then Chad took a hammer to a straight edge to wedge behind the granite pieces and pull them off with a crowbar. We eventually used clear caulk to seal where our new backsplash meets the counter.
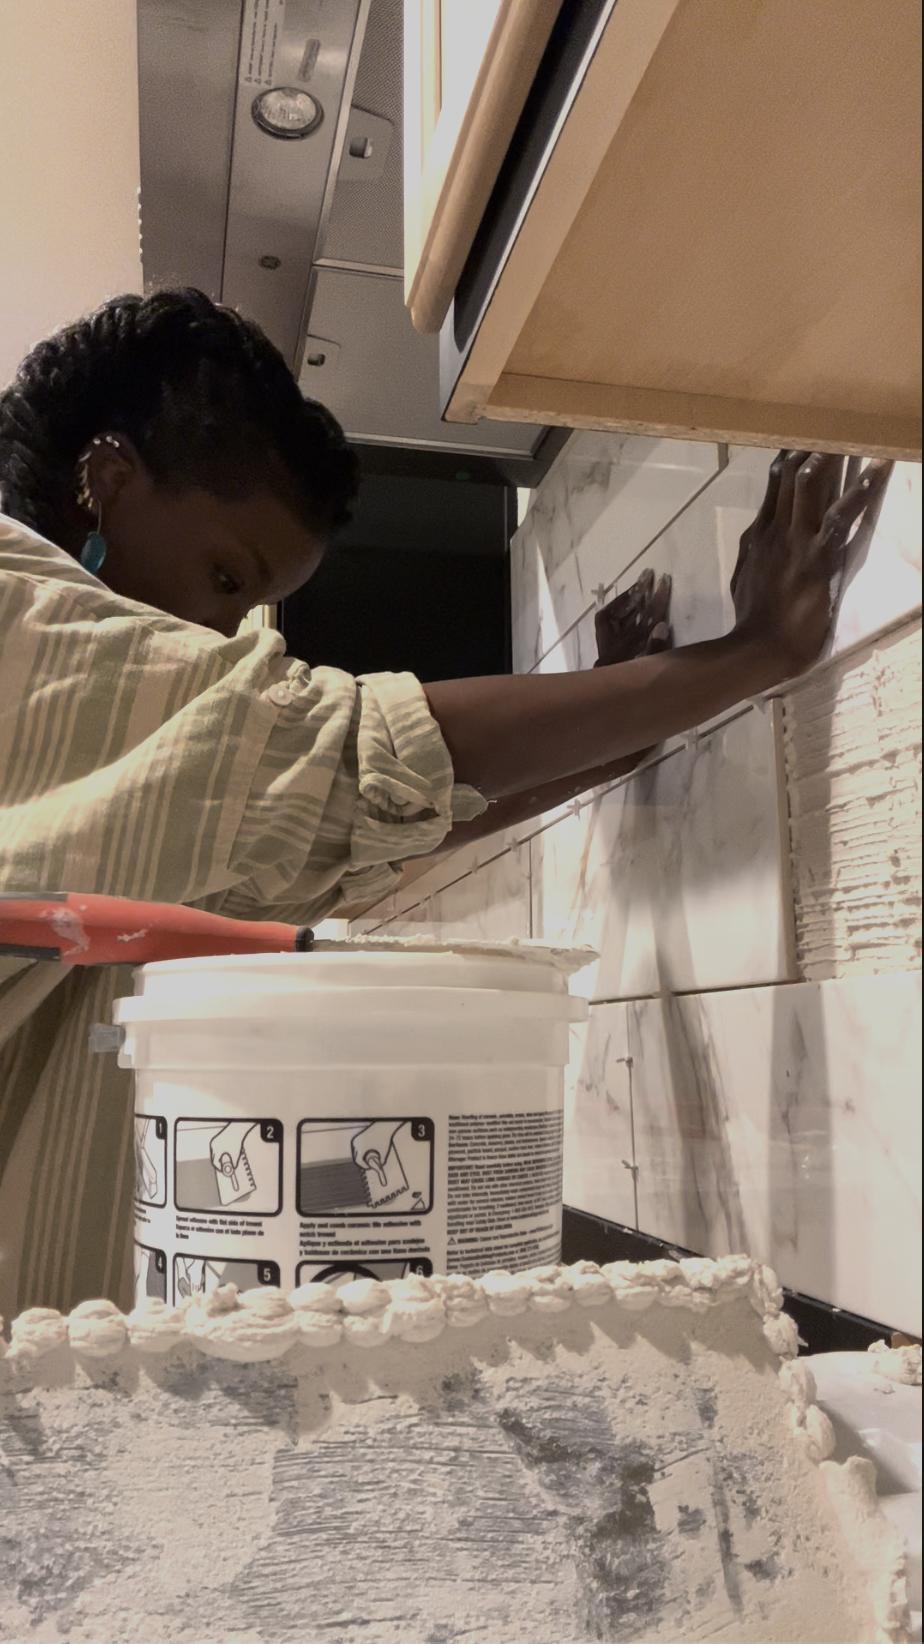
Chad measured and cut every tile piece we’d need with our new wet saw, and I was on mudding duty. We teamed up with the grout: Chad applied it, and I followed behind him cleaning up the lines with a sponge. I learned so much in this process! I’ve always been so intimidated to work with tile. Now, I can say I tiled our whole kitchen, and would be confident to do it again! This is part of what I love about doing things ourselves. It’s so empowering, and I learn that I’m more than my insecurities or fears limit me to.
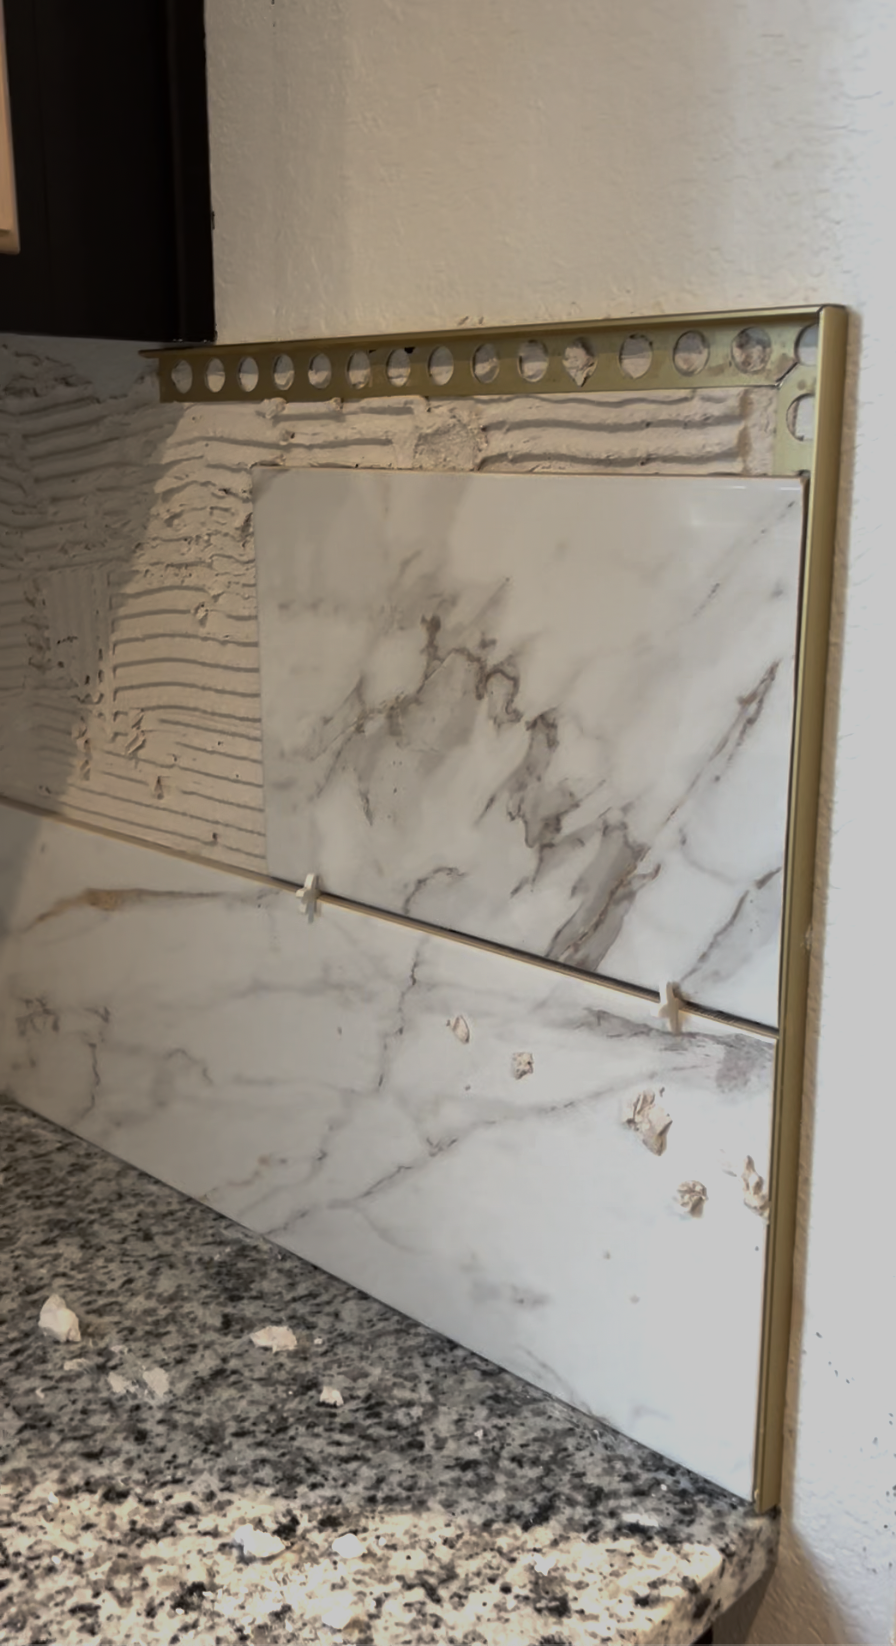

A couple small details I love are the gold grout we did (it sometimes looks more like a sand color, but we know what it is ;)) and the gold edging we used on the backsplash. It brings out the subtle gold marking in the marble of the tile. These were both Chad’s ideas, and it’s that kind of attention t0 detail that he’s so good at and makes my artistic heart sing.
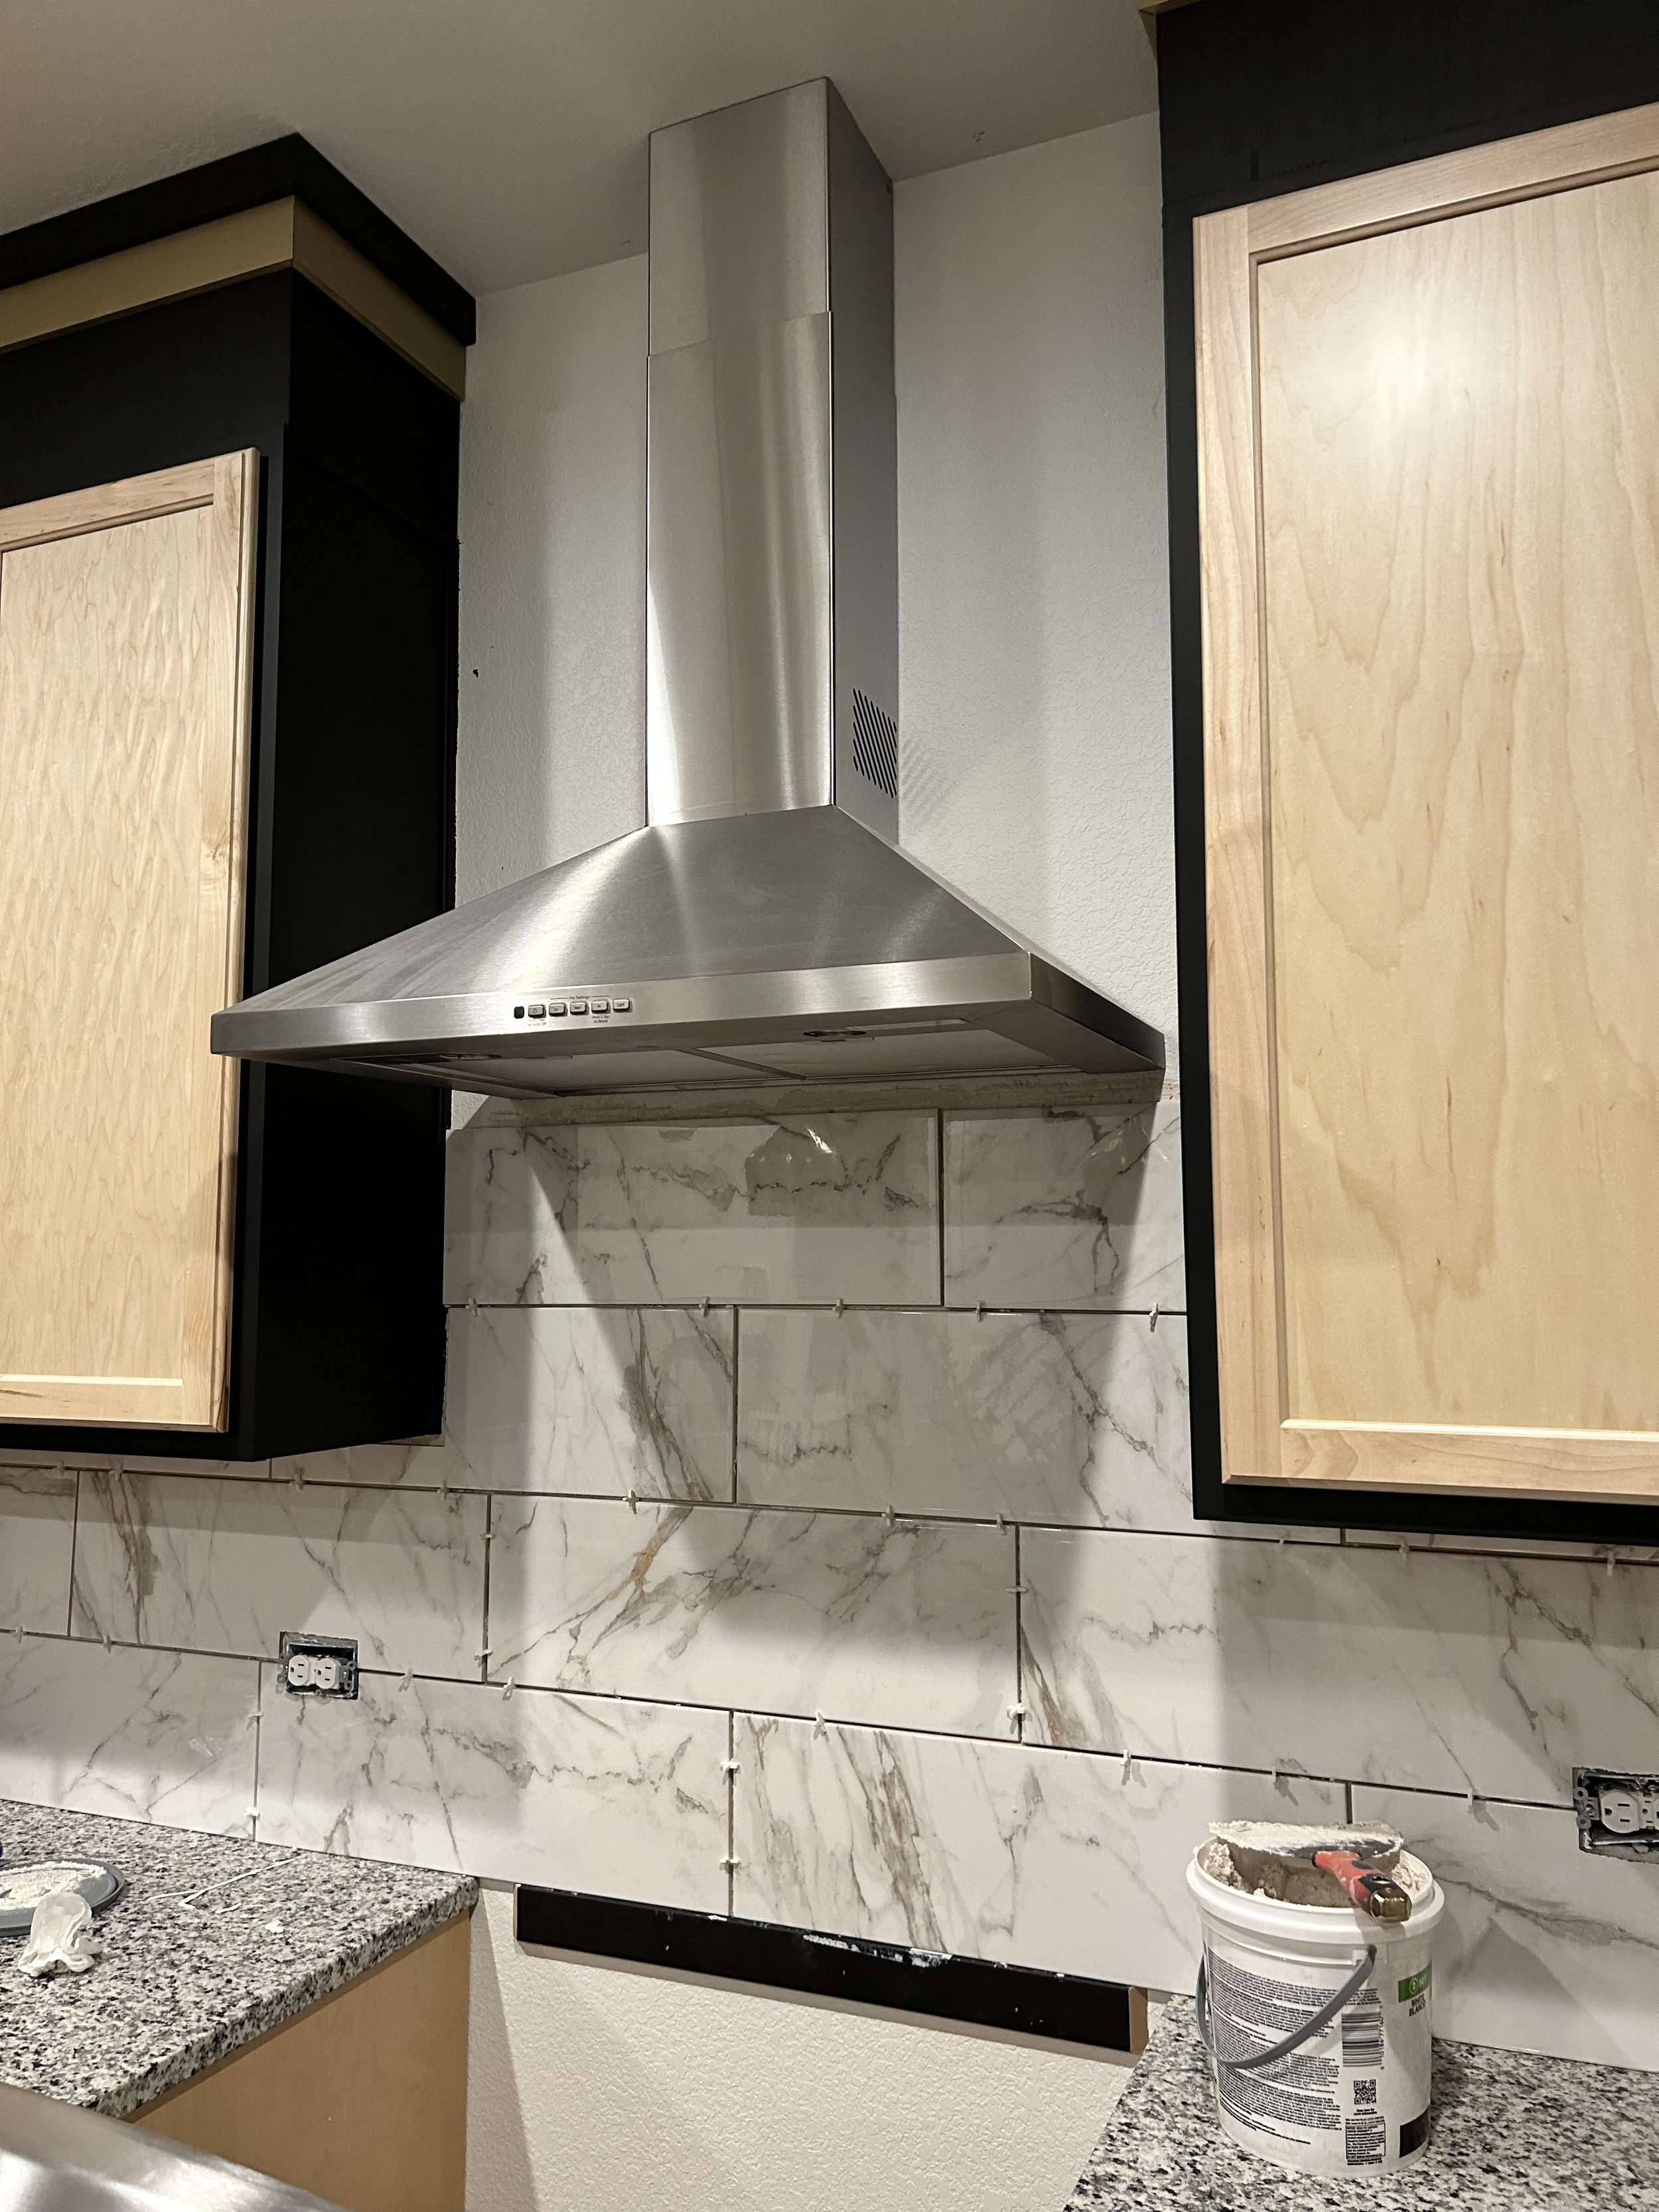
At first, we weren’t sure whether or not we should take the backsplash all the way up to the ceiling above the stove or just partway. When we realized it was our laziness leaning us toward stopping partway, we decided to take it all the way up, and ohhh am I so happy we did! The way it compliments our new hood and again matches the new height of the cabinets was fosho the right call. We were in between updating our hood from the silver one we had to either gold or black. We eventually chose black, as we didn’t want a gold hood to compete with those bold pendant lights. Also, trying to match that prominent of different gold pieces might have been a complete pain. I’m really glad we decided on black, because now that I see it, I can tell it matches our new cabinets way better than gold would have.

A freshly finished backsplash moment, before touching up the cabinets that got some mud and grout on them and before installing our new black hood. Just a bit UHBsessed with this marble tile Chad found us.
The only wall space in the kitchen that isn't back-splashed is around the window between the two glass cupboards we intentionally chose in the Design Center, and on the other side of the right glass cupboard. One day after we’d completed the backsplash, I was looking at that blank wall space and said to Chad, “Maybe we could do a wallpaper or something,” fully referring to store-bought wallpaper. Chad was like, “Yeah! You’d rock that!”
Waaaait, whet?
He nonchalantly went on, “You could do some cool African pattern or something!”

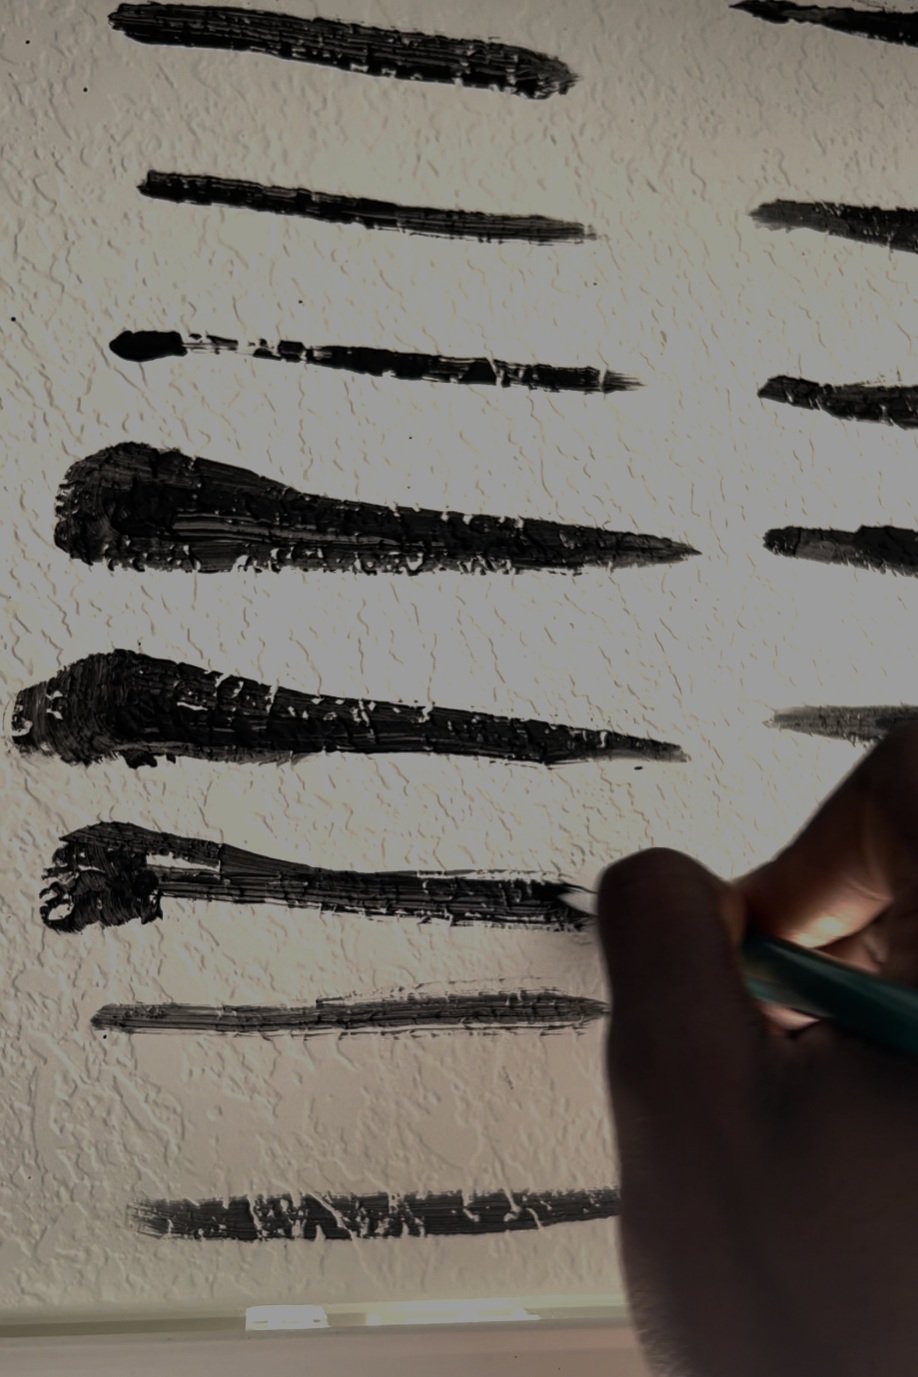
Sometimes I feel like my husband believes in me too much… at least more than I feel I deserve. But his confidence in me always makes me better, even if I’m not perfect at whatever I’m attempting. I was so honored and felt so seen that he not only wanted me to take on that challenge in our kitchen, but that he also wanted it to be a nod to my African heritage, without me even having to ask. Still a bit intimidated at the idea but equally excited, I looked up some African-inspired wallpaper patterns for inspiration. When we found one we both liked, I used it as a launching pad but wanted to make it my own too. So I kind of just went for it, using the same Onyx Black paint we'd used on the cabinets.
My first go at it was great! I used some painter’s tape to give me somewhat of the spacing idea I wanted. My second section, not so much, mostly because I skipped using the painter’s tape and my spacing was way off. If you’re gonna paint your own wallpaper, here are 4 “don’t” lessons I learned: 1.) Don’t skip the prep if you’re tryna match stuff up; 2.) Don’t be afraid to “erase” (aka paint over with the background color) and try again; 3.) Don’t take yourself too seriously; and 4.) Don’t chase perfection. It’s overrated.
After some trial and error and white paint over an entire section (thank God our builders had left behind the paint used on the walls!), I had hand-painted an original wallpaper in our kitchen! It’s imperfect and artsy and me, with my husband’s empowerment, and I love it. Every time I look up at it, I smile. Every time.

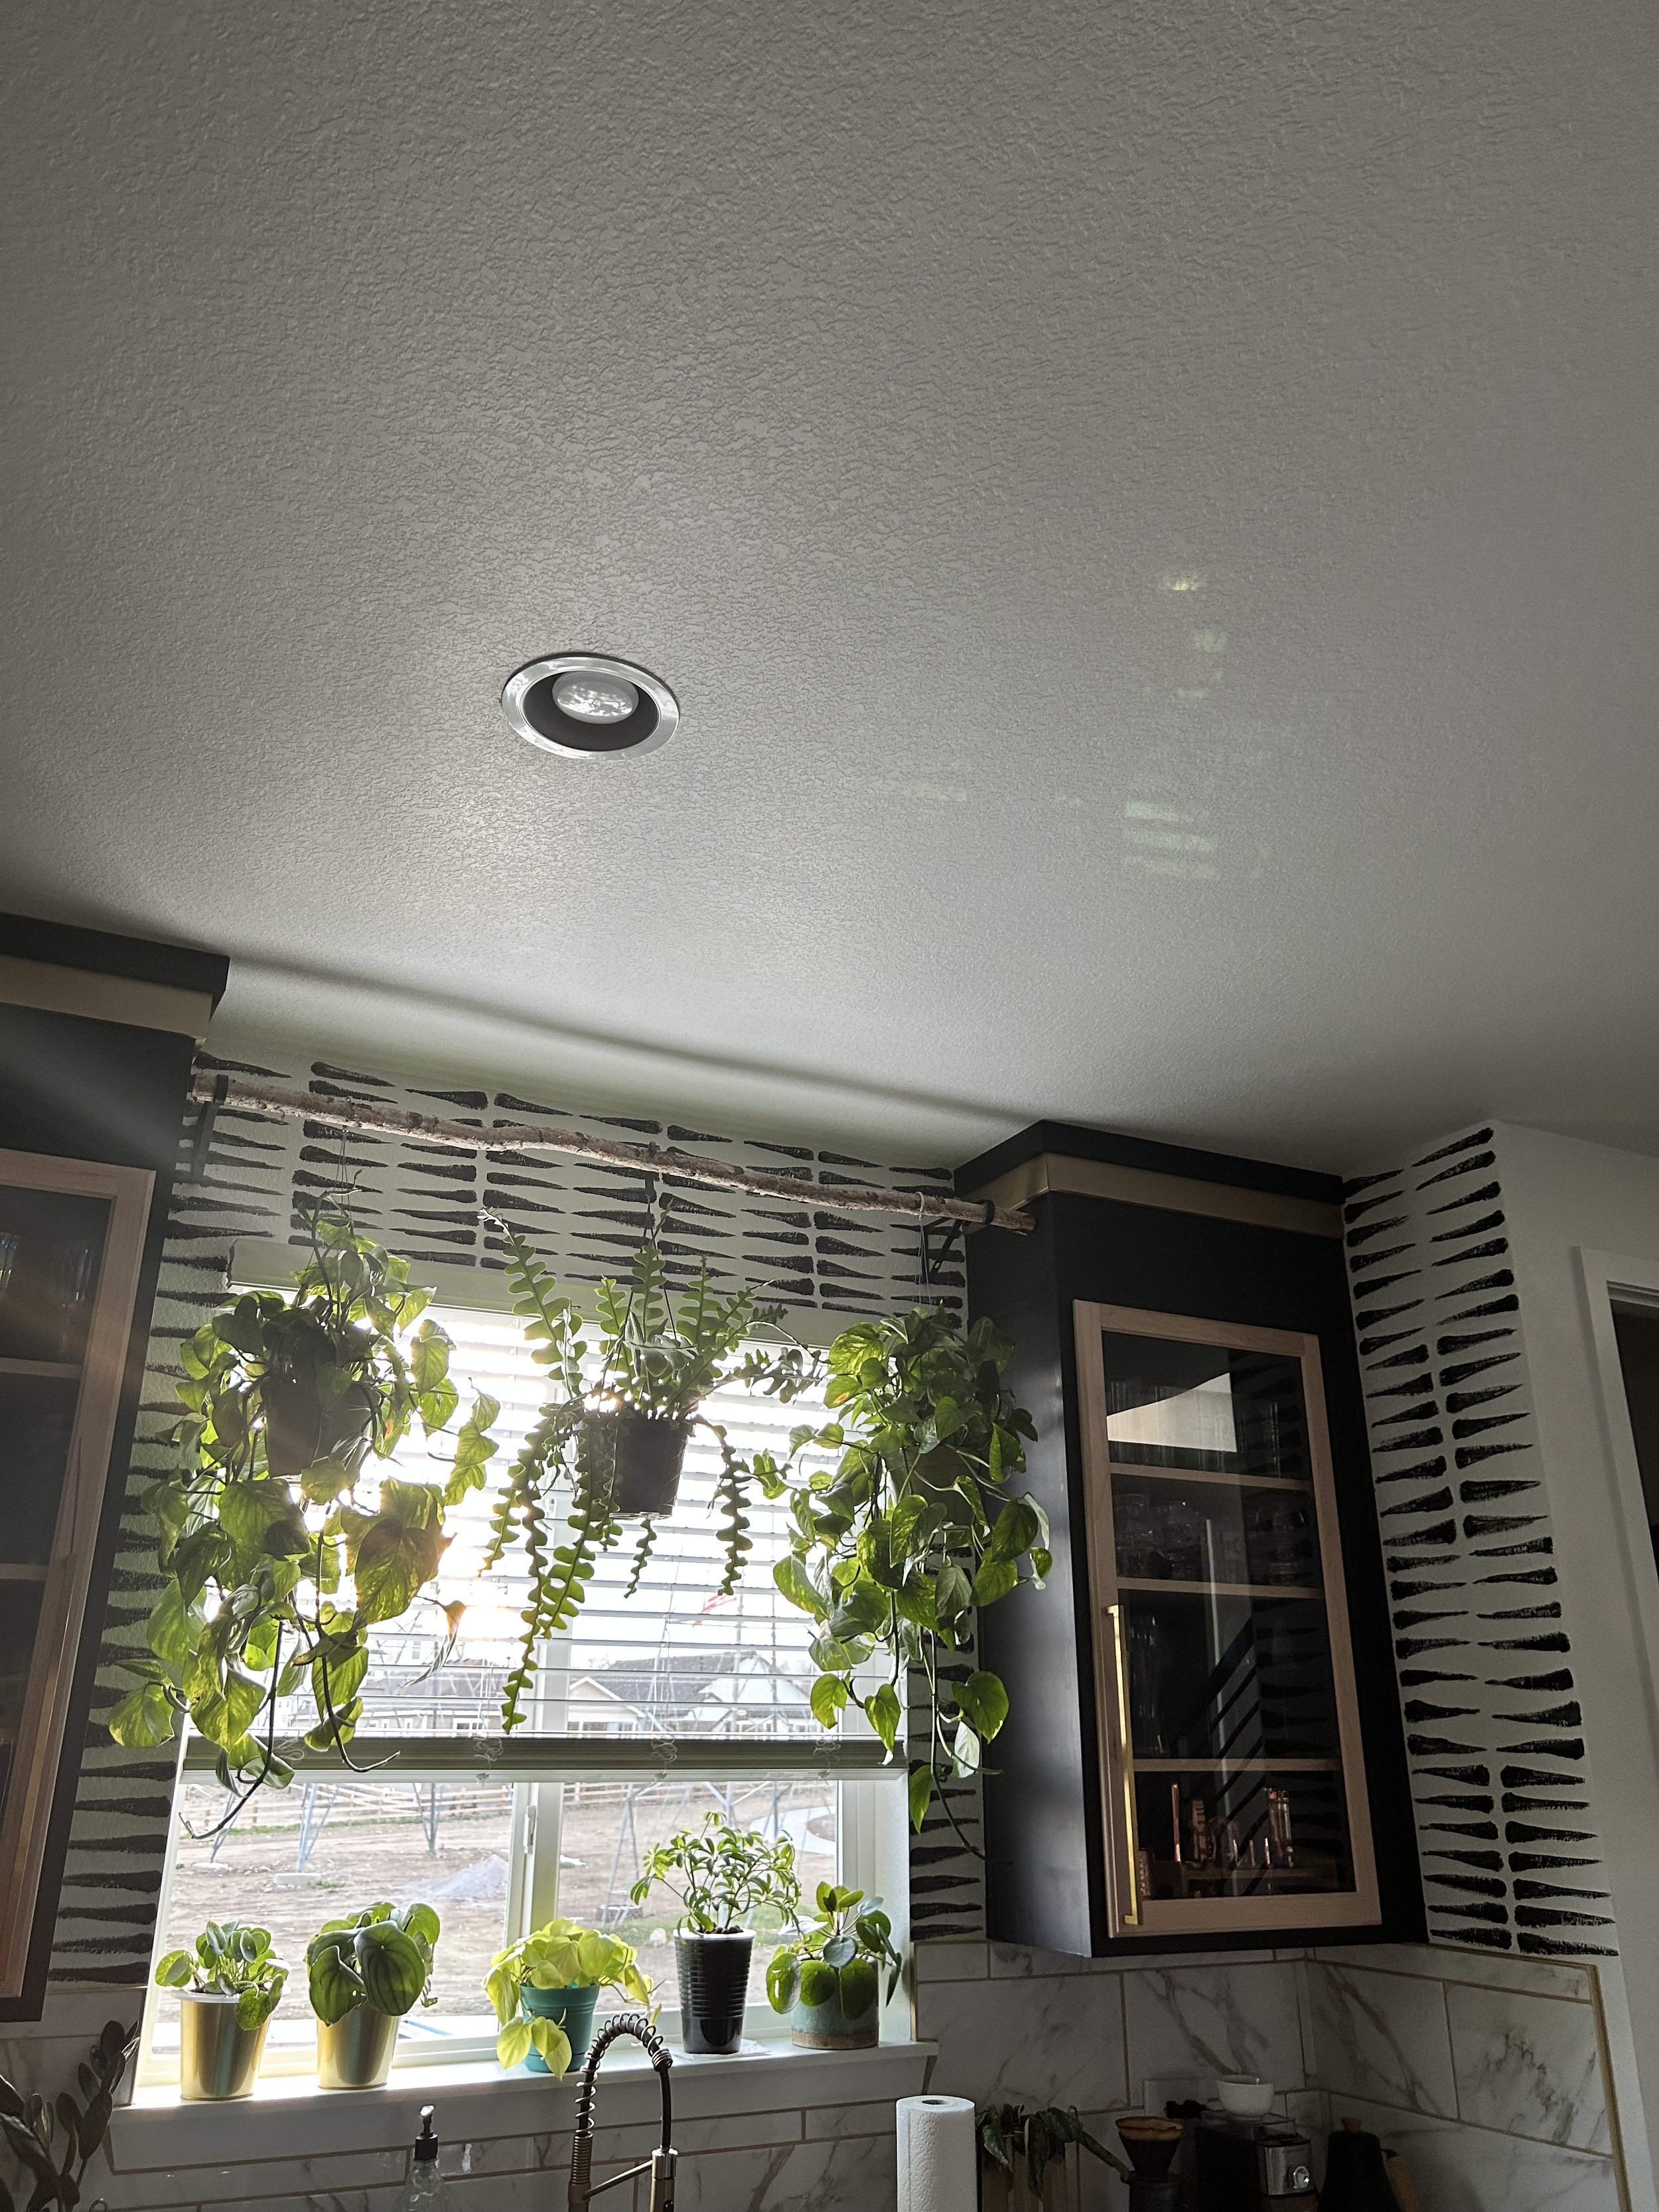
Basking in the joy that is this homemade plant hanger, before I hand-painted our wallpaper around the window.
I also DIY'd a wooden plant hanger above the sink, using two plant brackets from the hardware store and a birch wood stalk we already owned from my first home. This was yet another Chad idea that I was able to bring to life, which made my heart so happy, because I’m 100% more of the plant person in our marriage. We hung two large Golden Pothos plants from it with a wily Ric-Rac cactus in the middle. It effortlessly frames the kitchen window with mountain views, along with the smaller plants on the window sill.
We topped off the space with velvet emerald and gold bar stools for the island and a runner rug between the island and the oven. We still eventually want to do something with the back underside of the island, as well as the wall adjacent to the pantry door. But for now, we’ve made our kitchen our dream kitchen.
Part of what I love about our new kitchen is that I’ve never seen a kitchen like it. It’s pretty dang CHADAEZE-original!
P.S. ~ Check out Apartment Therapy’s feature of this DIY!

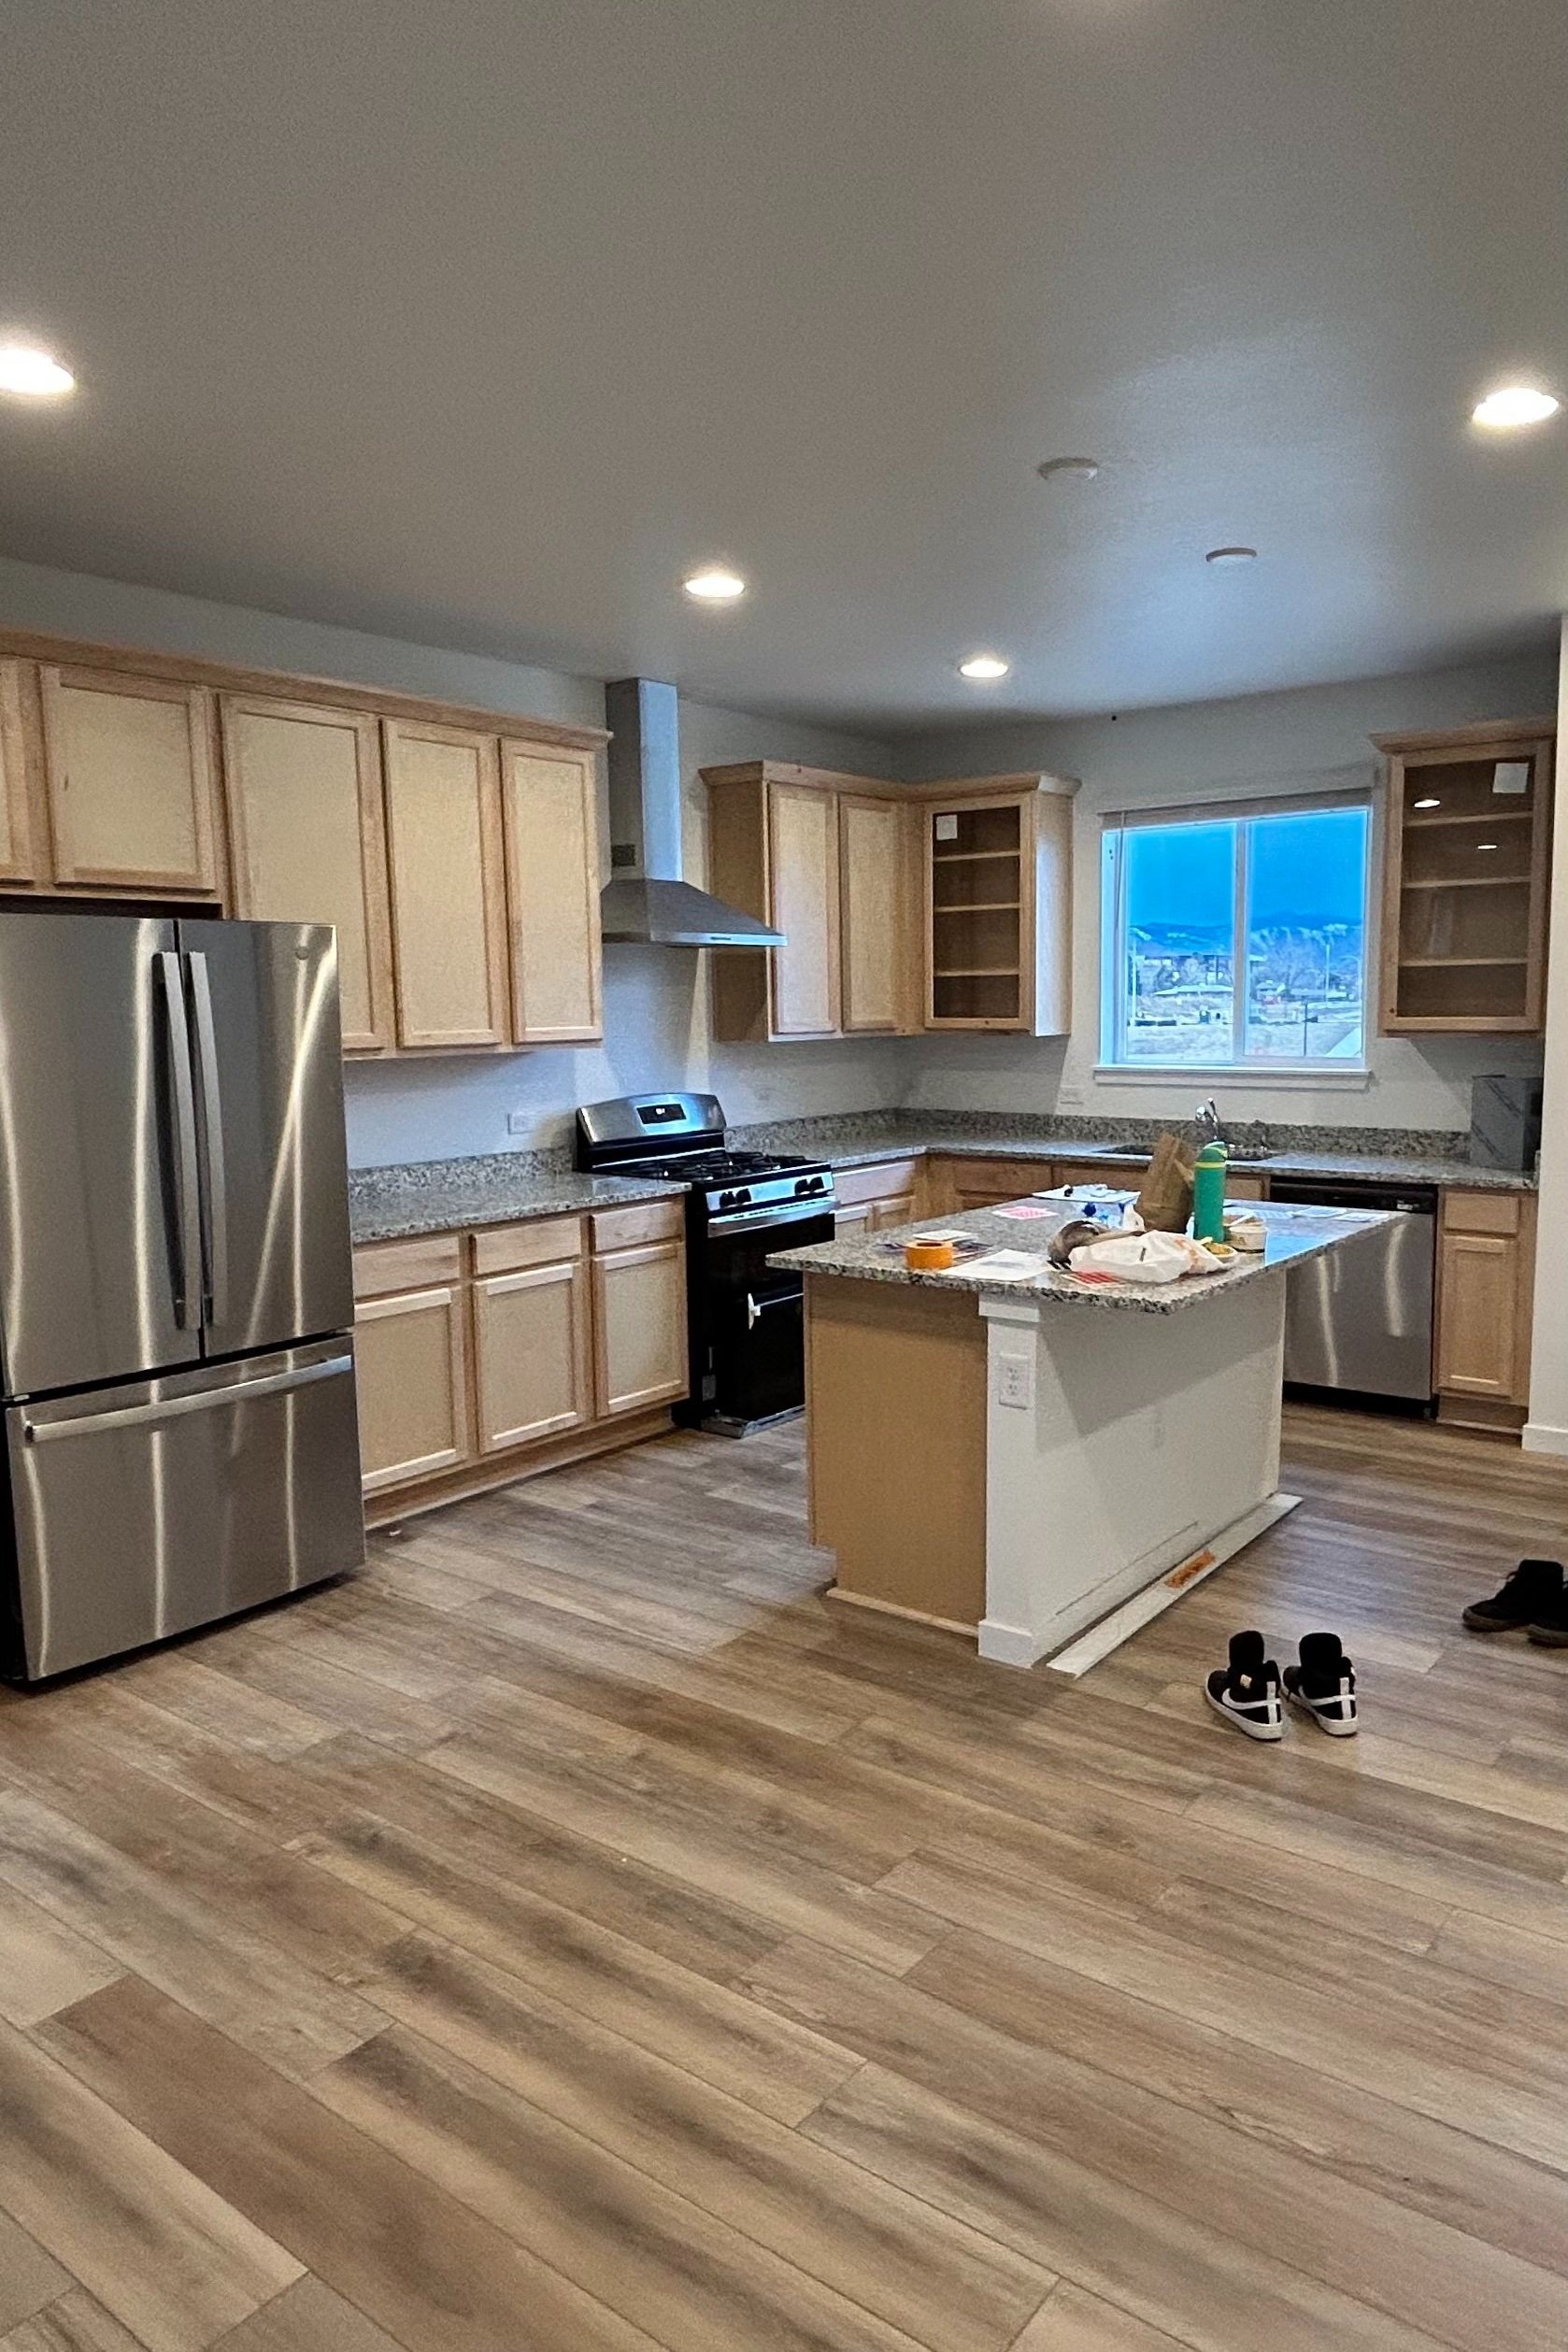
L: Our finished (for now) kitchen. Such an improvement from that “before” photo (R), right?

My new happy place in our home.
If you liked this post, Pin it to Pinterest! 👇🏾


We’re so excited to finish our living room up so we can have the entire floor more complete!